
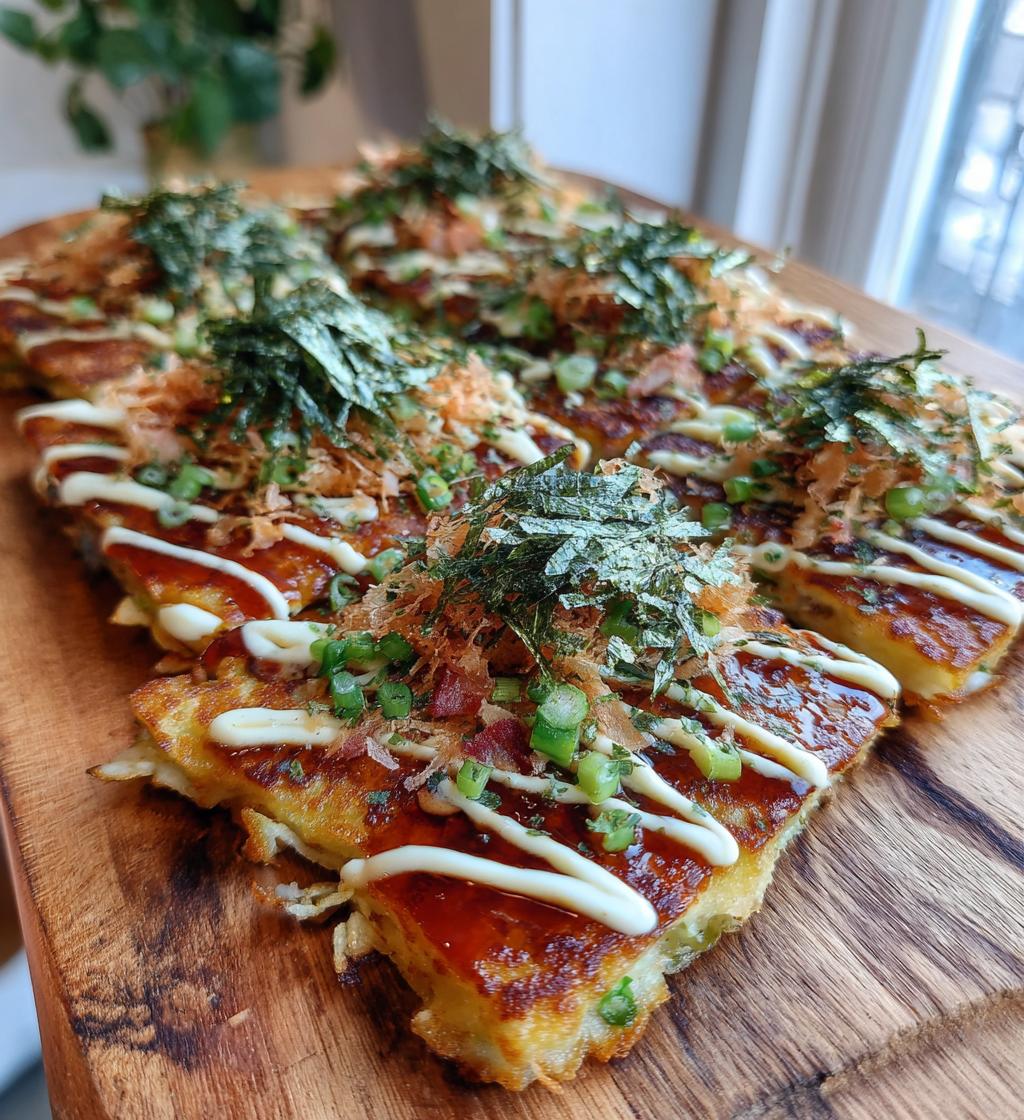
Oh my goodness, let me tell you about my absolute favorite dish – *Sheet Pan Okonomiyaki*! It’s this fantastic fusion of simplicity and deliciousness that brings the flavors of Japan right into your kitchen without all the fuss. You see, traditional okonomiyaki can be a bit tricky with all that flipping involved, but this sheet pan version makes it a breeze! I remember the first time I tried okonomiyaki at a tiny street food stall in Osaka. The savory aroma filled the air, and I was hooked instantly. It was love at first bite! Now, I can recreate that magic in my own home, and it’s so easy! This recipe offers a fun, family-friendly way to enjoy a classic dish. You just mix, pour, bake, and boom – a delicious meal that’s perfect for sharing. Trust me, you’re going to want to make this again and again!
Ingredients List
Gather these simple yet essential ingredients to create your *Sheet Pan Okonomiyaki*. Each one plays a vital role in delivering that authentic umami flavor!
- 2 cups all-purpose flour: This will give your okonomiyaki the perfect base. Sift it if you want a lighter texture, but it’s not mandatory.
- 1 1/2 cups dashi stock: The heart of this dish! You can use homemade or store-bought dashi. It adds that rich, savory flavor that makes this dish shine.
- 2 large eggs: These help bind everything together and add a lovely richness. Make sure they’re at room temperature for better mixing!
- 4 cups shredded cabbage: Fresh, crisp cabbage is a must! It adds texture and sweetness. I love using a food processor to shred it quickly.
- 1/2 cup green onions, chopped: These add a fresh, oniony kick. You can use more if you love that green onion flavor!
- 1/2 cup cooked bacon, chopped: For that smoky goodness! Feel free to substitute with cooked mushrooms or tofu for a vegetarian option.
- 1/4 cup pickled ginger, chopped: This adds a delightful zing! It’s a classic okonomiyaki ingredient that brightens everything up.
- 1/4 cup okonomiyaki sauce: This sweet and savory sauce is what brings everything together. You can find it in most Asian grocery stores.
- 1/4 cup mayonnaise: Use Japanese mayo if you can find it – it’s creamier and has a unique flavor that’s simply divine!
- Bonito flakes for garnish: These add a finishing touch with their umami flavor and beautiful presentation.
- Seaweed flakes for garnish: Just a sprinkle on top adds a touch of ocean flavor and color!
Now you’re all set! Let’s get cooking!
How to Prepare Sheet Pan Okonomiyaki
Now that we’ve gathered our ingredients, let’s dive into the fun part – making your *Sheet Pan Okonomiyaki*! It’s as easy as following these step-by-step instructions, and I promise you’ll have a delicious dish in no time.
Preheat the Oven
First things first, you’ll want to preheat your oven to 400°F (200°C). This step is crucial because a hot oven ensures that your okonomiyaki cooks evenly and gets that lovely golden brown on top. Don’t skip this step!
Mix the Batter
In a large mixing bowl, combine your 2 cups of all-purpose flour with 1 1/2 cups of dashi stock. Whisk it all together until the mixture is smooth. You’re aiming for a consistency similar to pancake batter – not too thick, not too runny. This will be the perfect base to hold all those tasty ingredients!
Incorporate Other Ingredients
Next, crack in your 2 large eggs and add the 4 cups of shredded cabbage, 1/2 cup of chopped green onions, 1/2 cup of chopped bacon, and 1/4 cup of chopped pickled ginger. Gently fold everything together until well combined. Be careful not to overmix; you want to keep that light texture!
Spread and Bake
Now, grab your sheet pan and line it with parchment paper. This is key to prevent sticking and make cleanup a breeze! Pour the batter mixture onto the pan and spread it evenly. Pop it into the oven and bake for 25-30 minutes. Keep an eye on it – it’s done when the top is golden brown and feels firm to the touch.
Add Toppings and Serve
Once out of the oven, it’s time to dress it up! Drizzle 1/4 cup of okonomiyaki sauce and 1/4 cup of mayonnaise over the top. Feel free to get creative with your drizzling technique! Finish it off with bonito flakes and seaweed flakes for that authentic touch. Cut into squares, serve warm, and enjoy every bite!
Nutritional Information
Let’s talk about the numbers! Each square of your *Sheet Pan Okonomiyaki* is packed with flavor while being relatively balanced. Here’s the estimated nutritional breakdown per serving:
- Calories: 250
- Fat: 10g
- Saturated Fat: 2g
- Unsaturated Fat: 6g
- Trans Fat: 0g
- Cholesterol: 50mg
- Sodium: 600mg
- Carbohydrates: 30g
- Fiber: 3g
- Protein: 8g
- Sugar: 1g
Keep in mind that these values may vary depending on the specific ingredients you choose, but this gives you a great idea of what to expect. Enjoy your tasty creation guilt-free!
Why You’ll Love This Recipe
There are so many reasons to fall in love with this *Sheet Pan Okonomiyaki*! Here are just a few:
- Super Easy to Make: With just a few simple steps, you’ll have a delicious meal ready to share.
- Versatile Toppings: Customize with your favorite ingredients, whether it’s extra veggies or different proteins!
- Family-Friendly: Perfect for a fun dinner that everyone can enjoy, and kids love the interactive aspect of adding their own toppings.
- Authentic Flavor: Enjoy the rich, savory taste of traditional okonomiyaki without the fuss of cooking it on a grill.
- Great for Leftovers: This dish reheats beautifully, making it perfect for meal prep or next-day lunches!
Tips for Success
To ensure your *Sheet Pan Okonomiyaki* turns out perfectly, keep these pro tips in mind:
- Use Fresh Ingredients: Fresh cabbage and green onions make a huge difference in flavor and texture, so avoid anything wilted!
- Experiment with Toppings: Feel free to swap bacon for shrimp, mushrooms, or even cheese for a unique twist!
- Check Doneness: To avoid overbaking, poke the center with a toothpick; it should come out clean or with a few moist crumbs.
- Let it Rest: Allow the okonomiyaki to cool for a few minutes before cutting; this helps it hold its shape.
- Customize Your Sauces: If you can’t find okonomiyaki sauce, a mix of Worcestershire and ketchup works in a pinch!
With these tips, your okonomiyaki will be a hit every time!
Variations
The beauty of *Sheet Pan Okonomiyaki* lies in its versatility! You can easily switch things up to suit your tastes:
- Vegetarian Delight: Omit the bacon and load in extra veggies like bell peppers, mushrooms, or zucchini for a hearty, meat-free option.
- Seafood Twist: Add cooked shrimp or squid to the batter for a delightful seafood flavor that pairs perfectly with the savory sauce.
- Spicy Kick: Toss in some chopped jalapeños or drizzle sriracha on top for those who love a little heat.
- Cheesy Goodness: Incorporate shredded cheese into the batter or sprinkle on top before serving for a melty, indulgent experience.
Feel free to get creative – the possibilities are endless!
Storage & Reheating Instructions
Storing your *Sheet Pan Okonomiyaki* is super simple! Just let it cool completely, then transfer any leftovers to an airtight container. It can stay in the refrigerator for up to 3 days. When you’re ready to enjoy it again, preheat your oven to 350°F (175°C) and place the squares on a baking sheet. Cover them with foil to keep moisture in, and heat for about 10-15 minutes until warmed through. You can also pop them in the microwave for a quick reheat, but I recommend the oven for that crispy texture! Enjoy every bite again!
FAQ Section
Got questions about *Sheet Pan Okonomiyaki*? Don’t worry, I’ve got you covered! Here are some common queries:
- Can I make this okonomiyaki gluten-free? Absolutely! Just substitute the all-purpose flour with a gluten-free flour blend, and you’re good to go.
- What can I use instead of dashi stock? If you can’t find dashi, vegetable broth works well too. It’ll still give a nice depth of flavor to your okonomiyaki.
- Is it possible to make this dish vegan? Yes! Swap the eggs for a flaxseed meal mixture and omit the bacon. You can use extra veggies for that hearty goodness!
- How do I store leftovers? Store any leftover okonomiyaki in an airtight container in the fridge for up to 3 days. They reheat beautifully!
- Can I freeze the okonomiyaki? Yes! Just make sure it’s completely cooled, then wrap it tightly in plastic wrap and foil before freezing. Thaw in the fridge before reheating.
I hope these answers help you enjoy your *Sheet Pan Okonomiyaki* even more!
Print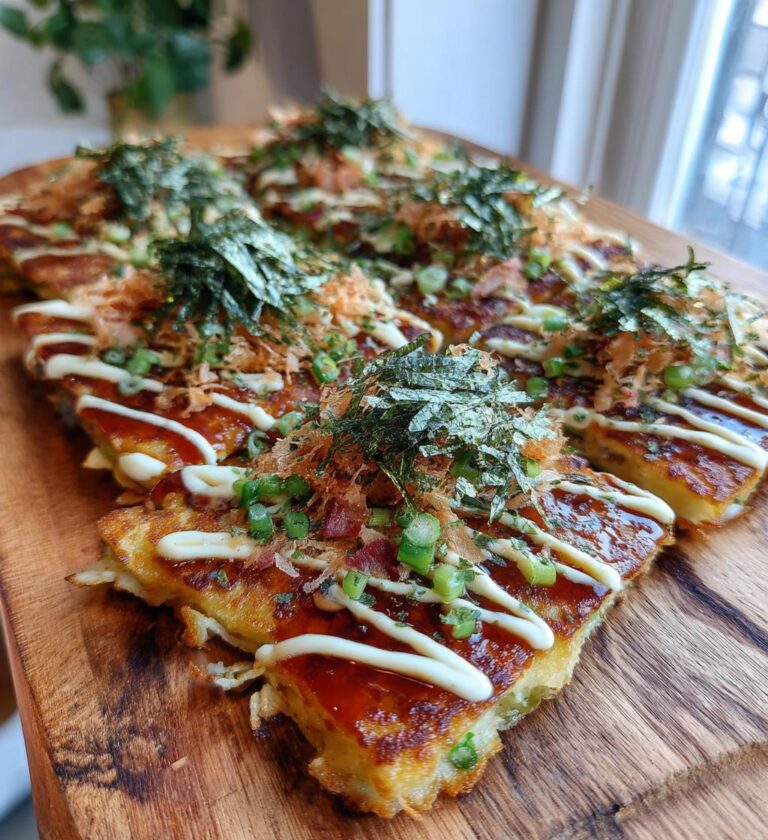
Sheet Pan Okonomiyaki: 5 Reasons You’ll Love This Dish
A simple and delicious sheet pan version of the traditional Japanese okonomiyaki.
- Total Time: 45 minutes
- Yield: 4 servings 1x
Ingredients
- 2 cups all-purpose flour
- 1 1/2 cups dashi stock
- 2 large eggs
- 4 cups shredded cabbage
- 1/2 cup green onions, chopped
- 1/2 cup cooked bacon, chopped
- 1/4 cup pickled ginger, chopped
- 1/4 cup okonomiyaki sauce
- 1/4 cup mayonnaise
- Bonito flakes for garnish
- Seaweed flakes for garnish
Instructions
- Preheat the oven to 400°F (200°C).
- In a large bowl, mix flour and dashi stock until smooth.
- Add eggs, cabbage, green onions, bacon, and pickled ginger to the mixture.
- Spread the mixture evenly on a sheet pan lined with parchment paper.
- Bake for 25-30 minutes or until the top is golden brown.
- Drizzle okonomiyaki sauce and mayonnaise over the top.
- Garnish with bonito flakes and seaweed flakes.
- Cut into squares and serve warm.
Notes
- Feel free to add your favorite toppings.
- This dish can be made vegetarian by omitting bacon.
- Store leftovers in the refrigerator for up to 3 days.
- Prep Time: 15 minutes
- Cook Time: 30 minutes
- Category: Main Dish
- Method: Baking
- Cuisine: Japanese
- Diet: Vegetarian
Nutrition
- Serving Size: 1 square
- Calories: 250
- Sugar: 1g
- Sodium: 600mg
- Fat: 10g
- Saturated Fat: 2g
- Unsaturated Fat: 6g
- Trans Fat: 0g
- Carbohydrates: 30g
- Fiber: 3g
- Protein: 8g
- Cholesterol: 50mg
Keywords: Sheet Pan Okonomiyaki, Japanese Pancake, Easy Okonomiyaki