
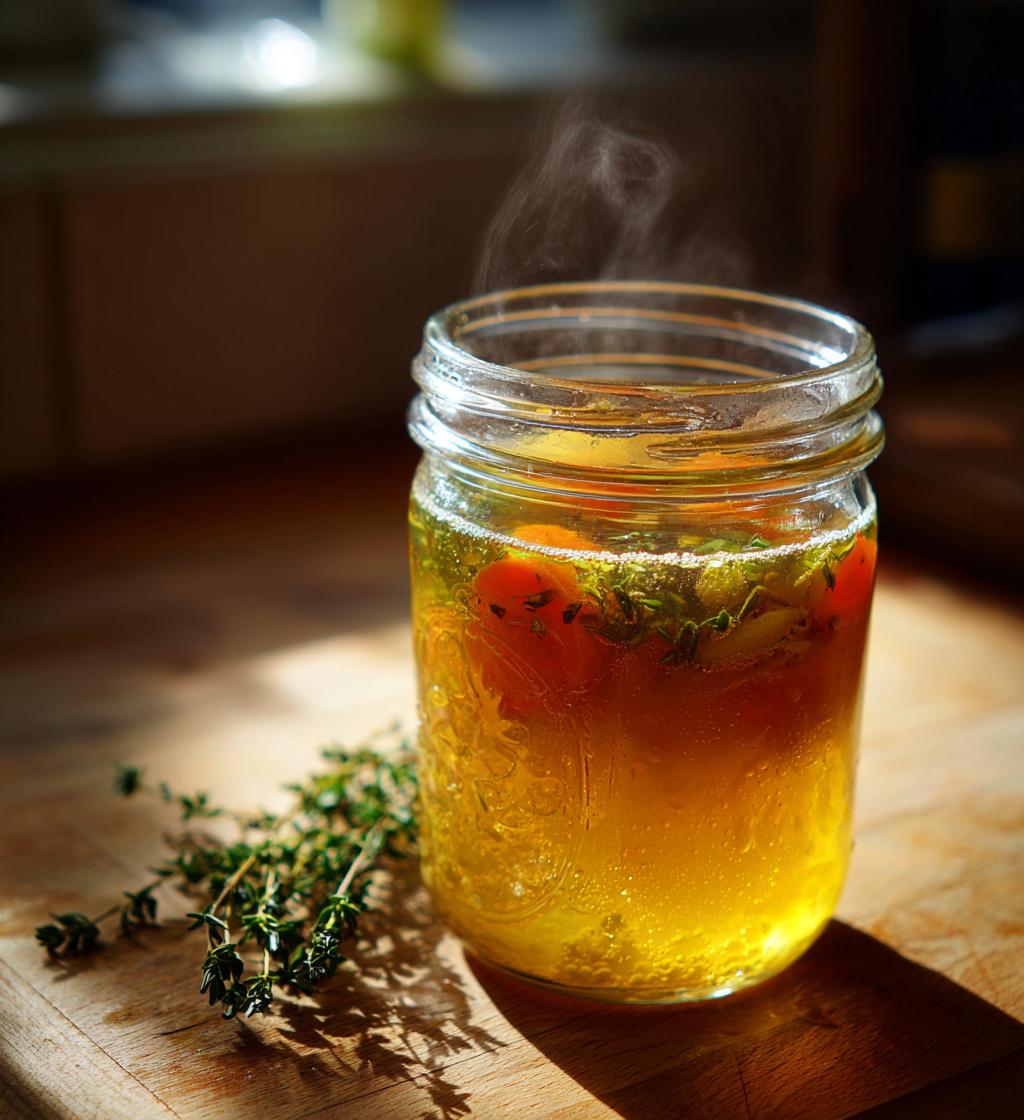
Oh my goodness, let me tell you – canning chicken broth at home is one of the best things you can do for your kitchen! Not only is it so simple, but it also fills your pantry with liquid gold that can transform any dish into something special. Whether you’re whipping up a cozy soup, a flavorful risotto, or just need a base for your sauces, homemade chicken broth is an absolute game-changer!
With just a few humble ingredients and a little bit of time, you can create a rich and nutritious broth that tastes a million times better than anything you’d find in a store. Plus, it’s a fantastic way to use up leftover chicken bones and veggies that might otherwise go to waste. Trust me, once you try this canning chicken broth recipe, you’ll never look back. Your future self will thank you every time you pop open a jar of that deliciousness!
Ingredients for Canning Chicken Broth Recipes
Let’s gather our ingredients and get ready to make some magic! This recipe is super straightforward, and I love how each component plays a role in building that comforting flavor. Here’s what you’ll need:
- 4 pounds of chicken carcasses or bones: You can use leftover bones from a roast chicken or buy them from the store. The more flavor-packed bones you have, the richer your broth will be!
- 2 medium onions, quartered: I always use yellow onions for their sweet flavor. No need to dice them finely; just quarter them and let them do their thing in the pot.
- 4 carrots, chopped: I typically use regular orange carrots, but if you’ve got those fancy rainbow ones, why not? Just chop them into manageable pieces; they add a lovely sweetness.
- 4 celery stalks, chopped: Celery adds a wonderful aromatic quality to the broth. Chop them into pieces that are about the same size as your carrots for even cooking.
- 10 cups of water: This is the base of your broth, so use good quality water. If you have filtered water, that’s even better!
- 1 tablespoon of salt: You can adjust this to your taste, but starting with a tablespoon gives a nice balance. You can always add more later if needed!
- 1 teaspoon of black peppercorns: Whole peppercorns provide depth without overwhelming the broth with spice. They’ll infuse flavor beautifully as it simmers.
- 2 bay leaves: These little leaves add that signature savory aroma. Just toss them in whole; they’ll do their magic while cooking.
That’s it! Gather these ingredients, and you’ll be well on your way to creating your very own homemade chicken broth. Trust me, you’ll love how easy and rewarding this process is!
How to Prepare Canning Chicken Broth Recipes
Alright, let’s dive into the fun part – making that luscious chicken broth! This process is super rewarding, and I promise you’ll be amazed at how easy it is. Here’s how we do it, step by step:
Step-by-Step Instructions
- Place chicken bones in a large pot: Start by grabbing a big pot because we’re making a generous batch here! Toss in those chicken bones, making sure they’re spread out a bit for even cooking.
- Add the vegetables and seasonings: Now, it’s time to add the quartered onions, chopped carrots, and celery. Don’t forget the salt, black peppercorns, and bay leaves! These ingredients are the backbone of our flavor.
- Pour in the water: Carefully add 10 cups of water to the pot, ensuring everything is submerged. If you’ve got a good quality filtered water, it’ll make your broth even tastier!
- Bring to a boil: Turn up the heat to medium and bring the mixture to a rolling boil. This step is crucial as it helps to extract all those rich flavors from the bones and veggies.
- Reduce the heat and simmer: Once boiling, lower the heat to a gentle simmer. Cover the pot and let it bubble away for about 3 to 4 hours. This slow cooking is where the magic happens – the longer, the better! Stir occasionally and adjust the heat as needed to keep it simmering.
- Strain the broth: After simmering, it’s time to strain! Carefully pour the broth through a fine mesh sieve into another pot or bowl, discarding the solids. You can use a ladle to help if things get a bit messy.
- Pour into sterilized jars: While the broth is still hot, pour it into your sterilized canning jars, leaving about an inch of headspace at the top. This is important for proper sealing and pressure canning.
- Seal and process: Wipe the rims of the jars with a clean cloth to remove any residue, then seal them with lids. Now, it’s time to process them in a pressure canner. Follow your canner’s instructions, but generally, you’ll process the jars for 25 minutes at 10 pounds of pressure.
And there you have it! You’ve just prepared your very own chicken broth for canning. It’s a simple process, but the results are absolutely worth it! Just imagine opening a jar of this goodness on a chilly evening – pure comfort in a bottle!
Tips for Success with Canning Chicken Broth Recipes
Now that you’re all set to make your own chicken broth, let’s chat about some essential tips to ensure your canning adventure is a total success! I’ve learned a few tricks along the way that really help elevate the flavor and safety of your broth. Here’s what I’ve got for you:
- Use quality ingredients: The better your chicken bones and vegetables, the better your broth will taste. If you can, use organic or free-range chicken for a richer flavor. Fresh veggies make a huge difference too!
- Don’t rush the simmer: I know it’s tempting to speed things up, but simmering your broth for the full 3-4 hours is key to extracting all those delicious flavors. Trust me, good things take time!
- Adjust seasoning after cooking: It’s best to keep the salt light while cooking. You can always adjust it later when you use the broth in your recipes. This way, you have more control over the final flavor.
- Check your pressure canner: Make sure to follow the specific instructions for your pressure canner. Each model can be a little different, and ensuring it’s working properly is crucial for safe canning.
- Leave enough headspace: When filling your jars, always remember to leave about an inch of headspace. This allows for proper sealing and prevents broth from leaking out during the canning process.
- Label your jars: Don’t forget to label your jars with the date and contents! This simple step will save you time and confusion when you’re ready to use your broth later on.
- Keep an eye on the seals: After processing, check that the seals on your jars are tight. If any jars haven’t sealed properly, refrigerate them and use the broth within a few days.
By keeping these tips in mind, you’ll be well on your way to creating flavorful, safe, and perfectly canned chicken broth. Happy canning!
Nutritional Information
Let’s take a moment to appreciate just how nutritious this homemade chicken broth is! Each serving packs a punch of flavor while keeping things light and healthy. Here’s the estimated nutritional breakdown for a 1-cup serving:
- Calories: 50
- Fat: 2g
- Saturated Fat: 0g
- Unsaturated Fat: 0g
- Trans Fat: 0g
- Carbohydrates: 2g
- Fiber: 0g
- Sugar: 0g
- Protein: 10g
- Sodium: 500mg
- Cholesterol: 30mg
This broth is not only low in calories but also a wonderful source of protein, making it a great addition to your meals. Plus, with its rich flavor and wholesome ingredients, you can feel good about using it in all your favorite recipes!
FAQ About Canning Chicken Broth Recipes
Got questions about canning chicken broth? You’re not alone! Here are some of the most common queries I get, along with helpful answers to make your canning experience smooth and successful.
What is the best way to store canned broth?
The best way to store your canned chicken broth is in a cool, dark place, like a pantry or cellar. Keep the jars upright and away from direct sunlight to prevent any degradation of flavor or quality. Ideally, you want to consume your canned broth within a year for the best taste, but it can last longer if stored properly. Just be sure to give your jars a quick check every now and then for any signs of spoilage!
Can you can broth without a pressure canner?
Unfortunately, you can’t safely can broth without a pressure canner. Broth is low in acidity, which means it requires the higher temperatures that only a pressure canner can provide to kill harmful bacteria and ensure safety. I know it might seem like a hassle, but trust me, investing in a good pressure canner is essential for canning chicken broth safely!
How long does homemade canned chicken broth last?
When stored properly, your homemade canned chicken broth can last up to a year on the shelf. After that, it might still be safe to consume, but the flavor and quality could degrade. To check for spoilage, look for any bulging lids, leaks, or unusual odors when you open a jar. If anything seems off, it’s better to err on the side of caution and toss it. Always prioritize safety when it comes to home canning!
Why You’ll Love Canning Chicken Broth Recipes
Let me share why canning chicken broth is a total game-changer for your kitchen! There are so many reasons to love this process, and I can’t wait for you to discover them all:
- Ease of Preparation: Seriously, once you’ve gathered your ingredients, the process is as simple as toss-and-simmer. You can set it and forget it while you go about your day!
- Versatility in Cooking: Canned chicken broth is like your secret weapon in the kitchen! Use it for soups, stews, risottos, sauces, or even to cook grains. The possibilities are endless!
- Cost Savings: Making your own broth means you can use leftover bones and veggies, saving you money and reducing waste. Plus, it’s way cheaper than buying store-bought broth!
- Flavor You Can’t Beat: Homemade chicken broth is so much richer and more flavorful than anything you’ll find in a can. You control the ingredients, so it’s tailored to your taste!
- Health Benefits: With wholesome ingredients, your homemade broth is packed with nutrients. It’s low in calories, high in protein, and can be a comforting remedy when you’re feeling under the weather.
- Convenience: Having jars of broth ready to go in your pantry means you can whip up a delicious meal in no time. Just grab a jar, and you’re halfway to dinner!
- A Fun and Rewarding Activity: Canning is not just practical; it’s enjoyable! There’s something so satisfying about creating your own stash of broth, knowing you made it from scratch.
With all these amazing benefits, it’s hard not to fall in love with canning chicken broth! You’ll be amazed at how it elevates your cooking and makes your kitchen feel even more inviting.
Serving Suggestions for Canned Chicken Broth
Now that you’ve got your delicious canned chicken broth ready to go, let’s talk about all the fantastic ways you can use it! This liquid gold is incredibly versatile, and I’m so excited to share some of my favorite serving suggestions with you:
- Classic Chicken Soup: This one’s a no-brainer! Simply bring your broth to a simmer, toss in some diced cooked chicken, vegetables, and noodles or rice for a cozy bowl of chicken soup that warms the soul.
- Flavorful Risotto: Use your broth as the base for creamy risotto. Just replace water with your chicken broth when cooking Arborio rice, and add some sautéed mushrooms and parmesan for an irresistible dish!
- Hearty Stews: Canned chicken broth is perfect for stews! Just combine it with chunks of meat, potatoes, and your favorite veggies, then let it simmer away until everything is tender and delicious.
- Savory Sauces: Use your broth to deglaze pans after sautéing meats or veggies. Add a splash of broth to your skillet, scrape up those tasty browned bits, and reduce it down for a fantastic sauce to drizzle over your dishes.
- Cooking Grains: Swap out water for chicken broth when cooking rice, quinoa, or couscous. The grains will soak up all that rich flavor, making for a much more delicious side dish!
- Vegetable Soups: For a lighter option, use your broth as the base for vegetable soups. Just throw in seasonal veggies and herbs for a refreshing, nourishing meal that’s quick and easy.
- Comforting Mashed Potatoes: Use chicken broth instead of milk or cream when mashing potatoes for a tasty twist! It adds depth of flavor while keeping them creamy and comforting.
These are just a few ideas to get you started, but the possibilities are really endless. Don’t hesitate to get creative and experiment with your canned chicken broth! Every jar opens up a world of flavor that can elevate any meal. Happy cooking!
Storage & Reheating Instructions
Now that you’ve got your delicious canned chicken broth, it’s important to know how to store it properly and reheat it effectively. This way, you can enjoy that rich, homemade flavor whenever you want! Here’s what you need to know:
Storing Your Canned Chicken Broth
After you’ve processed your jars and they’ve cooled, make sure to store them in a cool, dark place. A pantry or cupboard is perfect! Keep the jars upright and out of direct sunlight to maintain their quality. If you’ve labeled your jars (which I hope you did!), you’ll easily know when to use them. Ideally, aim to consume your broth within a year for the best taste, but if stored properly, it can last longer. Just keep an eye out for any signs of spoilage, like bulging lids or unusual odors.
Reheating Your Chicken Broth
When it’s time to enjoy that liquid gold, reheating it is a breeze! Here’s how I like to do it:
- On the Stovetop: Pour the desired amount of broth into a pot and heat it over medium heat. Stir occasionally until it’s warmed through. This method is quick and allows you to control the temperature easily.
- In the Microwave: If you’re in a hurry, you can microwave the broth! Pour it into a microwave-safe container, cover it loosely (to prevent splattering), and heat in 30-second intervals, stirring in between until it’s hot. Just be careful, as it can get quite hot!
- For Recipes: If you’re using the broth in a recipe, you can add it directly to your pot while cooking. Just adjust the cooking time as needed to accommodate the broth’s temperature.
And there you have it! Storing and reheating your canned chicken broth is super simple, ensuring you can enjoy that homemade goodness any time you need it. So go ahead and whip up your favorite recipes with confidence! Your kitchen will smell amazing, and your taste buds will thank you!
Print
Canning Chicken Broth Recipes: 7 Secrets for Rich Flavor
A simple recipe for canning chicken broth at home.
- Total Time: 4 hours 20 minutes
- Yield: 8 pints 1x
Ingredients
- 4 pounds of chicken carcasses or bones
- 2 medium onions, quartered
- 4 carrots, chopped
- 4 celery stalks, chopped
- 10 cups of water
- 1 tablespoon of salt
- 1 teaspoon of black peppercorns
- 2 bay leaves
Instructions
- Place chicken bones in a large pot.
- Add onions, carrots, celery, water, salt, peppercorns, and bay leaves.
- Bring the mixture to a boil over medium heat.
- Reduce heat and simmer for 3-4 hours.
- Strain the broth through a fine mesh sieve.
- Pour the hot broth into sterilized canning jars.
- Seal jars with lids and process in a pressure canner.
- Process for 25 minutes at 10 pounds of pressure.
Notes
- Always use sterilized jars and lids.
- Adjust salt to taste if desired.
- Store canned broth in a cool, dark place.
- Prep Time: 20 minutes
- Cook Time: 4 hours
- Category: Soup
- Method: Canning
- Cuisine: American
- Diet: Low Calorie
Nutrition
- Serving Size: 1 cup
- Calories: 50
- Sugar: 0g
- Sodium: 500mg
- Fat: 2g
- Saturated Fat: 0g
- Unsaturated Fat: 0g
- Trans Fat: 0g
- Carbohydrates: 2g
- Fiber: 0g
- Protein: 10g
- Cholesterol: 30mg
Keywords: canning chicken broth recipes