
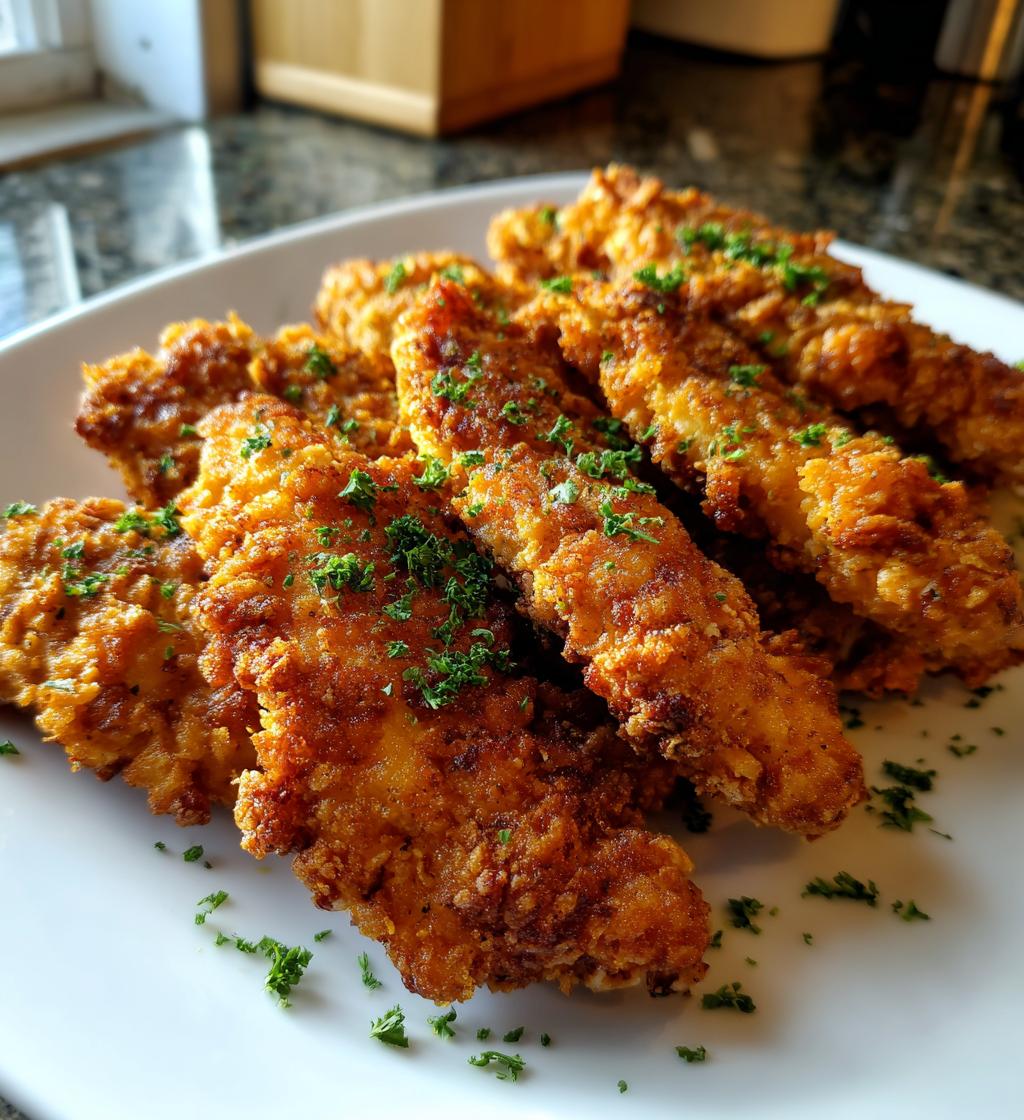
Oh, crispy chicken tenders! They’re like a warm hug on a plate, aren’t they? I can’t help but smile every time I think about them. Perfectly golden, crunchy on the outside, and tender on the inside, they hit all the right notes for a quick meal or a satisfying snack. I remember those lazy Sunday afternoons when I’d whip up a batch just for myself, dipping them in tangy barbecue sauce or creamy ranch. It’s always a treat to hear that delightful crunch as you take a bite! Whether you’re feeding a family or just indulging in a guilty pleasure, chicken tenders are a crowd-pleaser every time. Plus, they’re super versatile—you can pair them with just about anything! Trust me, once you’ve tried making your own, you’ll never want to go back to store-bought again!
Oh, crispy chicken tenders! They’re like a warm hug on a plate, aren’t they? I can’t help but smile every time I think about them. Perfectly golden, crunchy on the outside, and tender on the inside, they hit all the right notes for a quick meal or a satisfying snack. I remember those lazy Sunday afternoons when I’d whip up a batch just for myself, dipping them in tangy barbecue sauce or creamy ranch. It’s always a treat to hear that delightful crunch as you take a bite! Whether you’re feeding a family or just indulging in a guilty pleasure, chicken tenders are a crowd-pleaser every time. Plus, they’re super versatile—you can pair them with just about anything! Trust me, once you’ve tried making your own, you’ll never want to go back to store-bought again!
Ingredients List
- 1 lb chicken fillet, cut into strips
- 1 cup all-purpose flour, seasoned with salt, pepper, garlic powder, and paprika
- 1 cup breadcrumbs, for that irresistible crunch
- 2 eggs, beaten
- 1 tsp salt, to enhance the flavors
- 1 tsp pepper, for a little kick
- 1/2 tsp garlic powder, because who doesn’t love garlic?
- 1/2 tsp paprika, adding a subtle warmth
- Oil for frying, enough to cover the bottom of your pan
How to Prepare Chicken Tenders
Making chicken tenders at home is easier than you might think! Just follow these steps, and you’ll have crispy, golden tenders ready to devour in no time. Let’s get started!
Step-by-Step Instructions
- Prepare the Chicken: Start by cutting your chicken fillet into strips. Aim for about 1 to 1.5 inches wide so they cook evenly. The key here is to keep them consistent in size for the best results.
- Set Up Your Breading Station: You’ll need three shallow bowls for the breading process. In the first bowl, add your seasoned flour; in the second, beat the eggs; and in the third, place your breadcrumbs. This setup makes everything organized and easier to manage.
- Coat the Chicken: Take a chicken strip and coat it in the seasoned flour. Make sure to shake off any excess flour—nobody wants a clumpy tender! Next, dip it into the beaten eggs, letting any excess drip back into the bowl. Finally, roll it in the breadcrumbs until it’s well coated. Repeat this for all your chicken strips. You want each piece to be nice and crispy, so don’t skimp on the breadcrumbs!
- Heat the Oil: In a large pan, heat about 1/4 inch of oil over medium heat. To test if it’s hot enough, drop in a small piece of bread—if it sizzles and bubbles up, you’re ready to fry!
- Fry the Chicken Tenders: Carefully place a few chicken tenders in the hot oil, making sure not to overcrowd the pan. Fry them for about 3-4 minutes on each side or until they’re golden brown and cooked through. You’ll know they’re done when they reach an internal temperature of 165°F. Use tongs to turn them, so you don’t get splattered with hot oil!
- Drain and Serve: Once they’re beautifully golden, remove the chicken tenders from the pan and place them on a plate lined with paper towels to drain any excess oil. This step is crucial for keeping them crispy!
- Enjoy: Serve your chicken tenders hot with your favorite dipping sauce. I love pairing mine with a zesty ranch or a classic honey mustard. Yum!
Why You’ll Love This Recipe
- Quick Preparation: With just 30 minutes from start to finish, you can whip up a delicious meal or snack without spending all day in the kitchen!
- Crispy Texture: The combination of seasoned flour, eggs, and breadcrumbs creates a mouthwatering crunch that you just can’t resist.
- Versatile Enjoyment: Chicken tenders can be served with a variety of dipping sauces or sides, making them perfect for any occasion—dinner, lunch, or even a game day snack!
- Kid-Friendly: These tenders are a hit with kids and adults alike, making family mealtime a breeze!
- Customizable: Feel free to experiment with different spices or breadcrumbs to make this recipe your own. You can even bake them for a healthier twist!
Tips for Success
If you want your chicken tenders to turn out perfectly every single time, I’ve got some fantastic tips to share! Trust me, these little tricks can make a big difference in your frying game.
Perfecting the Breading Technique
When you bread your chicken, be sure to coat each piece thoroughly. An even layer of flour, egg, and breadcrumbs creates that irresistible crunch. Don’t rush through this step! Make sure to shake off any excess flour before dipping in the egg. Too much flour can lead to clumpy tenders, and nobody wants that. Oh, and don’t skip the breadcrumbs—this is where the magic happens!
Keeping Oil Temperature Just Right
Temperature is key when frying chicken tenders. If the oil’s too hot, the outside will burn before the inside is fully cooked. If it’s too cool, you’ll end up with greasy, soggy tenders. I recommend using a kitchen thermometer to check for around 350°F to 375°F. If you don’t have one, just drop a small piece of bread into the oil. If it sizzles and browns within a minute, you’re good to go!
Don’t Overcrowd the Pan
It’s tempting to fry a bunch of tenders at once, but overcrowding the pan can lower the oil temperature, leading to uneven cooking. Work in batches if you need to! This way, each tender gets the attention it deserves and ensures that glorious golden crust.
Let Them Rest
After frying, let the chicken tenders rest on paper towels for a few minutes. This helps them stay crispy by allowing excess oil to drain off. Plus, it gives you a moment to prepare your dipping sauces or set the table!
Experiment with Bread Crumbs
If you want an extra crunch, try using panko breadcrumbs instead of regular ones. They add a delightful texture that takes these tenders to the next level. You can even mix in some grated Parmesan cheese for a cheesy twist!
With these simple tips, you’ll be on your way to making chicken tenders that are not just good, but absolutely irresistible. Happy frying!
Nutritional Information Section
Here’s a quick breakdown of the estimated nutritional values for each serving of these delicious chicken tenders. Remember, these numbers are based on typical values and can vary depending on specific brands and cooking methods.
- Serving Size: 4 pieces
- Calories: 350
- Fat: 15g
- Saturated Fat: 3g
- Unsaturated Fat: 10g
- Trans Fat: 0g
- Cholesterol: 70mg
- Sodium: 600mg
- Carbohydrates: 35g
- Fiber: 1g
- Sugar: 1g
- Protein: 25g
These chicken tenders are not only tasty but also pack a punch with their protein content, making them a great choice for a satisfying meal! Enjoy knowing you’re treating yourself to something that’s both delicious and nourishing.
FAQ Section
Got questions about making the perfect chicken tenders? Don’t worry—I’ve got you covered! Here are some of the most common queries I hear, along with my best tips and tricks to ensure your tenders turn out amazing every time.
What’s the best cooking method for chicken tenders?
While frying gives chicken tenders that classic crispy texture, you can also bake them for a healthier option! Just preheat your oven to 400°F, place the breaded tenders on a lined baking sheet, and bake for about 20 minutes, flipping halfway through. They might not be quite as crispy, but they’ll still be delicious!
Can I use frozen chicken for this recipe?
You absolutely can! Just make sure to thaw the chicken strips thoroughly before breading them. Frozen chicken can have excess moisture, which might affect the breading process. Pat them dry with paper towels for the best results!
How do I store leftover chicken tenders?
To keep your chicken tenders fresh, store them in an airtight container in the fridge for up to 3 days. To keep them crispy, try not to stack them on top of each other. If you have a lot left over, you can also freeze them for later! Just make sure they cool completely before placing them in a freezer-safe bag.
What’s the best way to reheat chicken tenders?
The best way to reheat chicken tenders is in the oven to maintain that crispy texture. Preheat your oven to 375°F and bake them for about 10-15 minutes, or until heated through. You can also use an air fryer for about 5-7 minutes at 350°F for that perfect crunch!
Can I use different seasonings or breadcrumbs?
Definitely! Feel free to get creative with your seasonings. You can try adding Italian herbs, Cajun spices, or even a bit of lemon zest for a fresh twist. As for breadcrumbs, panko is a fantastic choice for extra crunch, but you can also use crushed cornflakes or even seasoned breadcrumbs for added flavor!
Are these chicken tenders gluten-free?
Yes! If you use gluten-free flour and gluten-free breadcrumbs, you can easily make these chicken tenders gluten-free. Just double-check the labels to make sure all your ingredients meet your dietary needs!
With these FAQs, I hope you feel more confident in making your chicken tenders. Don’t hesitate to reach out if you have more questions—I’m always here to help you make the best meal possible!
Variations
One of the best things about chicken tenders is their versatility! You can easily switch things up to keep your taste buds excited. Here are some fun ideas to inspire your next batch:
Seasoning Twists
- Spicy Kick: Add cayenne pepper or chili powder to your seasoned flour for a fiery version that’s perfect for those who love a bit of heat!
- Herb-Infused: Mix in dried herbs like oregano, thyme, or Italian seasoning into your flour for a fragrant twist.
- Sweet and Savory: Combine brown sugar with your spices for a delightful sweet and savory flavor that pairs beautifully with the crispy coating.
Dipping Sauce Ideas
- Classic Ranch: You can never go wrong with ranch dressing! It’s a perfect cooling counterpart to the crispy chicken.
- Honey Mustard: A mix of honey and Dijon mustard makes for a sweet and tangy dip that’s a crowd favorite.
- Buffalo Sauce: Toss your crispy tenders in buffalo sauce for a spicy, tangy twist that’s perfect for game days!
- Garlic Aioli: Whip up a quick garlic aioli with mayonnaise, minced garlic, lemon juice, and a pinch of salt for a creamy, luxurious dip.
Cooking Method Swaps
- Baking Instead of Frying: For a healthier option, you can bake your breaded chicken tenders! Just preheat the oven to 400°F and place them on a baking sheet lined with parchment paper. Bake for about 20 minutes, flipping halfway through.
- Air Fryer Magic: If you have an air fryer, this is a game-changer! Cook your tenders at 375°F for about 10-12 minutes for a crispy texture with less oil.
Feel free to experiment and create your own signature chicken tenders! The possibilities are endless, and it’s all about what you love. Enjoy the process, and happy cooking!
Storage & Reheating Instructions
So, you’ve made a delicious batch of chicken tenders, and now you’ve got some leftovers. No worries! I’ve got the best tips for storing and reheating them so they stay just as crispy and tasty as when they first came out of the pan.
Storing Leftovers
To keep your chicken tenders fresh, allow them to cool completely before storing. This step is super important because you don’t want steam building up in the container, which can make them soggy. Once cooled, place your chicken tenders in an airtight container lined with paper towels. The paper towels will absorb any excess moisture, helping to keep that delightful crunch!
Seal the container tightly and store it in the refrigerator for up to 3 days. If you know you won’t finish them in that time, consider freezing them instead. Just make sure they’re completely cooled, then place them in a freezer-safe bag or container. They’ll last for about 2 to 3 months in the freezer, ready for a quick meal later!
Reheating Chicken Tenders
When it’s time to enjoy those leftover chicken tenders, the goal is to reheat them without losing that crispy exterior. Here’s how I do it:
- Oven Method: Preheat your oven to 375°F. Place the chicken tenders on a baking sheet lined with parchment paper. Bake for about 10-15 minutes, flipping them halfway through, until they’re heated through and crispy again. This method is fantastic for retaining that crunch!
- Air Fryer Method: If you have an air fryer, this is my favorite way to reheat! Simply place the chicken tenders in the air fryer basket in a single layer. Set the temperature to 350°F and heat for about 5-7 minutes. They’ll come out just like new—crispy and delicious!
- Microwave Method (if you must): In a pinch, you can use the microwave, but be prepared for a softer texture. Place the chicken tenders on a microwave-safe plate and cover them with a damp paper towel to help retain moisture. Heat in short intervals of 30 seconds until warmed through. Just know they won’t be as crispy!
With these storage and reheating instructions, you’ll have perfectly crispy chicken tenders ready to enjoy anytime. Happy snacking!
Print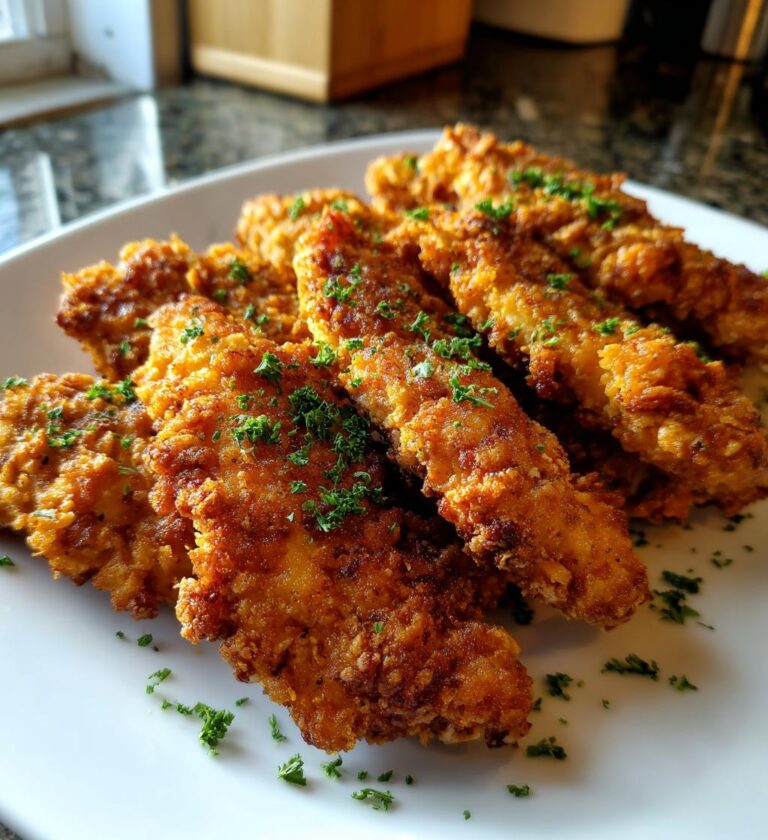
Crispy Chicken Tenders: 7 Reasons to Make Them Today
Crispy and tender chicken tenders, perfect for a quick meal or snack.
- Total Time: 30 minutes
- Yield: 4 servings 1x
Ingredients
- 1 lb chicken fillet, cut into strips
- 1 cup flour
- 1 cup breadcrumbs
- 2 eggs
- 1 tsp salt
- 1 tsp pepper
- 1/2 tsp garlic powder
- 1/2 tsp paprika
- Oil for frying
Instructions
- Prepare the chicken by cutting it into strips.
- Set up a breading station with flour, beaten eggs, and breadcrumbs.
- Season the flour with salt, pepper, garlic powder, and paprika.
- Coat each chicken strip in flour, then dip in eggs, and finally coat with breadcrumbs.
- Heat oil in a pan over medium heat.
- Fry the chicken tenders until golden brown, about 3-4 minutes per side.
- Remove and drain on paper towels.
- Serve hot with your favorite dipping sauce.
Notes
- Use panko breadcrumbs for extra crunch.
- Adjust seasoning to taste.
- Try baking instead of frying for a healthier option.
- Prep Time: 15 minutes
- Cook Time: 15 minutes
- Category: Main Dish
- Method: Frying
- Cuisine: American
- Diet: Gluten Free
Nutrition
- Serving Size: 4 pieces
- Calories: 350
- Sugar: 1g
- Sodium: 600mg
- Fat: 15g
- Saturated Fat: 3g
- Unsaturated Fat: 10g
- Trans Fat: 0g
- Carbohydrates: 35g
- Fiber: 1g
- Protein: 25g
- Cholesterol: 70mg
Keywords: chicken tenders, fried chicken, quick meal, snack