

Let me tell you, Cheesy Chicken Roll-Ups are a staple in my kitchen, and for good reason! They’re not only super easy to whip up, but they also pack a flavor punch that leaves everyone asking for seconds. I remember the first time I made these for a small gathering. I had a mix of family and friends over, and as soon as I pulled them out of the oven, the aroma filled the room. It was like a warm hug! Everyone dove right in, and I barely had time to grab a plate for myself. These roll-ups are perfect for busy weeknights or when you’re just craving something comforting. Plus, you can customize them however you want! Whether you’re a cheese lover or trying to sneak in some veggies, they’re incredibly versatile. Trust me, once you try these, they’ll become your go-to dish, too!
Ingredients for Cheesy Chicken Roll-Ups
Gathering the right ingredients is key to making these scrumptious Cheesy Chicken Roll-Ups! Here’s everything you’ll need:
- 2 cups cooked chicken, shredded
- 1 cup cream cheese, softened
- 1 cup shredded cheddar cheese
- 4 large tortillas
- 1/2 cup salsa
- 1 teaspoon garlic powder
- 1 teaspoon onion powder
- Salt and pepper to taste
Make sure your cream cheese is nice and soft—it makes mixing a breeze! And don’t hesitate to use your favorite kind of cheese; I’ve played around with pepper jack for a little kick, and it’s just fabulous. Now, let’s get cooking!
How to Prepare Cheesy Chicken Roll-Ups
Now, let’s dive into the fun part—making those delicious Cheesy Chicken Roll-Ups! Follow these simple steps, and you’ll have a crowd-pleasing dish in no time.
Step 1: Preheat the Oven
First things first, you’ll want to preheat your oven to 375°F (190°C). Preheating is super important because it ensures your roll-ups cook evenly and come out perfectly golden brown. Trust me, you don’t want to skip this step!
Step 2: Prepare the Filling
In a large mixing bowl, combine the shredded chicken, softened cream cheese, shredded cheddar cheese, salsa, garlic powder, onion powder, and a good pinch of salt and pepper. Mix everything together until it’s well combined and creamy—this is where the magic happens! The filling should be thick but spreadable, so if it feels too stiff, don’t hesitate to add a little more salsa to loosen it up.
Step 3: Assemble the Roll-Ups
Now comes the fun part! Take a tortilla and spread a generous amount of the chicken filling evenly over it, leaving about an inch around the edges. Roll it up tightly from one end to the other and place it seam-side down in a baking dish. Make sure they’re snug but not crammed together. If you want to really seal them, you can dab a little cream cheese on the edge before rolling to help them stick.
Step 4: Bake the Roll-Ups
Pop those beauties in the oven and bake for about 20 minutes. You’ll know they’re done when they’re heated through and the tops are a lovely golden brown. The aroma will be irresistible, so get ready for your mouth to water!
Step 5: Serve and Enjoy
Once they’re out of the oven, let them cool for a couple of minutes before slicing them into bite-sized pieces. Serve warm with extra salsa or your favorite dipping sauce on the side. They’re perfect for game nights, parties, or just a cozy dinner at home. Enjoy every cheesy, gooey bite!
Why You’ll Love This Recipe
Cheesy Chicken Roll-Ups are not just a meal; they’re a delightful experience! Here are some reasons why you’ll fall in love with this recipe:
- Quick Preparation: You can whip these up in under 35 minutes, making them perfect for busy weeknights.
- Flavorful: The combination of creamy cheese and seasoned chicken creates a taste explosion in every bite.
- Customizable: Feel free to add your favorite veggies or switch up the cheeses to suit your taste!
- Kid-Friendly: Kids adore them! They’re fun to eat and easy to hold, making mealtime a breeze.
Trust me, once you make these, they’ll be on your regular dinner rotation!
Tips for Success
Want to make your Cheesy Chicken Roll-Ups even better? Here are some of my favorite tips to ensure they turn out perfect every time!
- Ingredient Substitutions: Don’t have cream cheese? Greek yogurt makes a fantastic swap, adding a tangy flavor while keeping it creamy. You can also use rotisserie chicken for extra flavor and convenience!
- Add Some Veggies: Sneak in some fresh spinach, diced bell peppers, or even corn for added nutrition and texture. Just sauté the veggies lightly before mixing them in to soften them up.
- Experiment with Cheeses: While cheddar is classic, try using mozzarella for a stretchy, gooey effect or pepper jack for a spicy kick. Each cheese brings a unique flavor that can totally change the vibe!
- Make Ahead: Prep your roll-ups in advance and keep them in the fridge. Bake them just before serving for a quick and easy meal that feels fresh!
With these tips, you’ll be a Cheesy Chicken Roll-Up pro in no time! Enjoy the deliciousness!
Variations of Cheesy Chicken Roll-Ups
One of the best things about Cheesy Chicken Roll-Ups is their versatility! You can easily customize them to suit your taste or use what you have on hand. Here are a few fun variations to inspire your creativity:
- Cheese Lovers Delight: Swap out the cheddar for a mix of mozzarella and gouda for a melty, rich flavor. You can even add a sprinkle of Parmesan on top before baking for an extra cheesy crust.
- Spicy Kick: If you love heat, mix in some diced jalapeños or add a dash of hot sauce to the filling. You could also use pepper jack cheese to amp up the spice level!
- Veggie Power: Add some sautéed mushrooms, spinach, or zucchini to the chicken mixture for a healthy twist. This not only boosts nutrition but also adds great texture and flavor.
- BBQ Chicken Roll-Ups: Replace the salsa with your favorite BBQ sauce and throw in some diced red onion for a smoky, tangy flavor that’s sure to please!
Feel free to mix and match these ideas to create your perfect roll-up masterpiece!
Nutritional Information
When it comes to the nutritional content of these Cheesy Chicken Roll-Ups, it’s always good to remember that values can vary depending on the specific ingredients and brands you use. While I can give you some estimated nutritional values, keep in mind that they’re not set in stone. Generally, each roll-up contains about 320 calories, with around 18g of fat and 20g of protein. If you’re watching your sodium intake, they have about 540mg per serving. For the most accurate information, consider calculating the values based on your own ingredient choices. Happy cooking!
FAQ Section
Got questions about Cheesy Chicken Roll-Ups? No worries, I’ve got you covered! Here are some common queries I hear:
- How do I store leftovers? If you have any roll-ups left (which is rare, let me tell you!), just place them in an airtight container and store them in the fridge for up to three days. They make for a fantastic snack!
- Can I freeze them? Absolutely! Before baking, wrap them tightly in plastic wrap and then foil. They can last in the freezer for about 2-3 months. Just thaw them overnight in the fridge before baking.
- What’s the best way to reheat them? You can pop them in the oven at 350°F (175°C) for about 10-15 minutes or until heated through. If you’re in a hurry, the microwave works too—just be careful not to dry them out!
- Can I use different ingredients? Of course! Feel free to swap in different cheeses, add veggies, or even use turkey or beef instead of chicken. The possibilities are endless!
Enjoy your roll-ups and happy cooking!
Print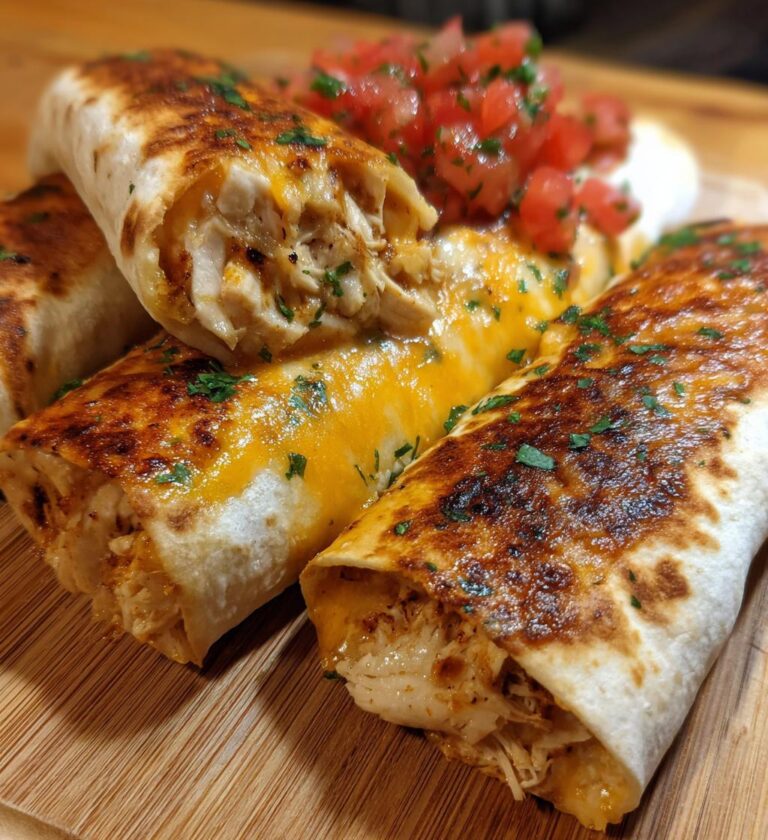
Cheesy Chicken Roll-Ups: 5 Ways to Savor Every Bite
Cheesy Chicken Roll-Ups are a delicious and easy-to-make dish that combines chicken and cheese in a flavorful wrap.
- Total Time: 35 minutes
- Yield: 4 servings 1x
Ingredients
- 2 cups cooked chicken, shredded
- 1 cup cream cheese, softened
- 1 cup shredded cheddar cheese
- 4 large tortillas
- 1/2 cup salsa
- 1 teaspoon garlic powder
- 1 teaspoon onion powder
- Salt and pepper to taste
Instructions
- Preheat your oven to 375°F (190°C).
- In a bowl, mix together the shredded chicken, cream cheese, cheddar cheese, salsa, garlic powder, onion powder, salt, and pepper.
- Spread the mixture evenly over each tortilla.
- Roll each tortilla tightly and place seam-side down in a baking dish.
- Bake for 20 minutes until heated through and golden brown.
- Slice and serve warm.
Notes
- You can use any type of cheese you prefer.
- Feel free to add vegetables like bell peppers or spinach.
- Serve with additional salsa or dipping sauce.
- Prep Time: 15 minutes
- Cook Time: 20 minutes
- Category: Main Dish
- Method: Baking
- Cuisine: American
- Diet: Low Fat
Nutrition
- Serving Size: 1 roll-up
- Calories: 320
- Sugar: 2g
- Sodium: 540mg
- Fat: 18g
- Saturated Fat: 10g
- Unsaturated Fat: 6g
- Trans Fat: 0g
- Carbohydrates: 24g
- Fiber: 2g
- Protein: 20g
- Cholesterol: 60mg
Keywords: Cheesy Chicken Roll-Ups, chicken recipes, easy dinner