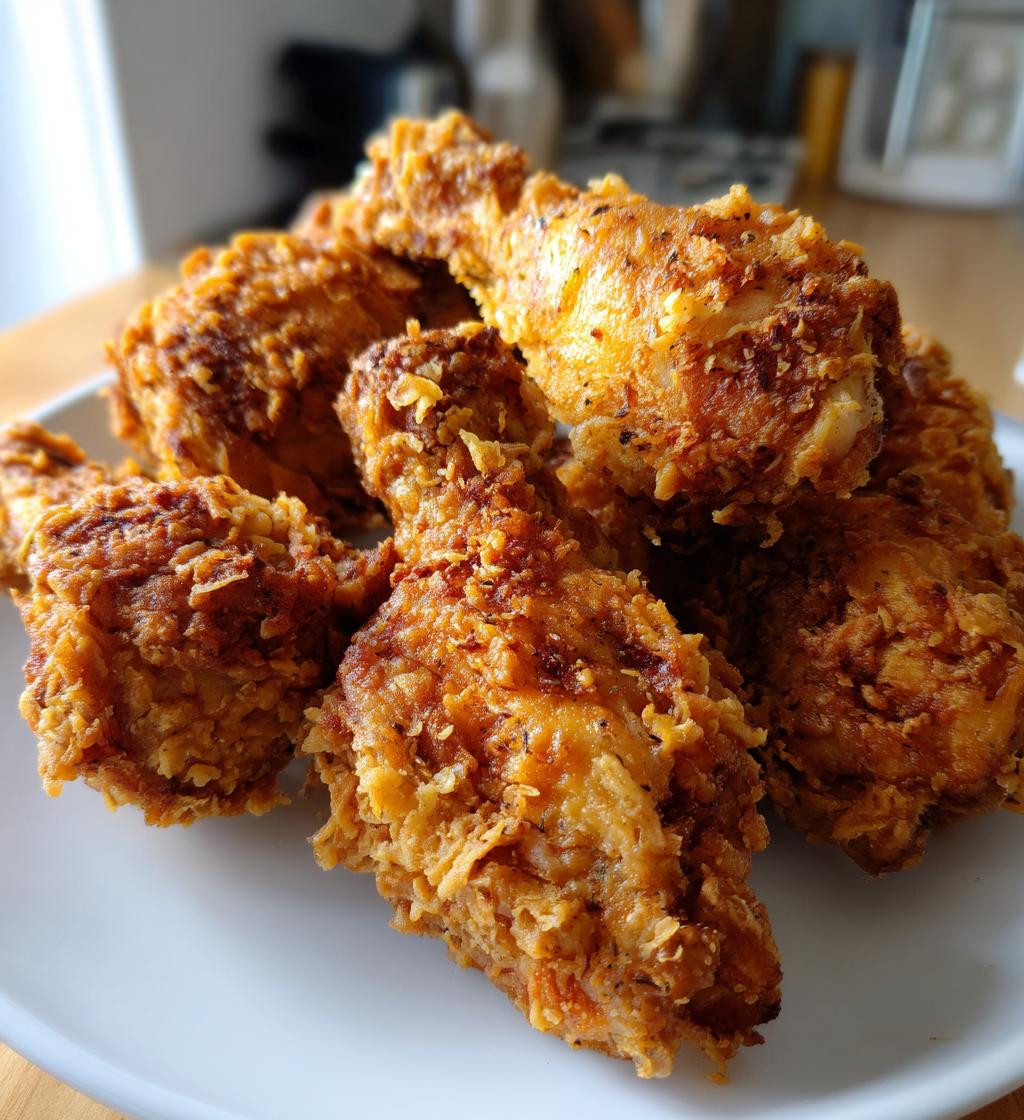
There’s just something magical about the smell of crispy fried chicken wafting through the kitchen, isn’t there? I mean, can you really resist that golden, crunchy exterior? That’s why I’m so excited to share my recipe for *Crispy Dill Fried Chicken*. This dish takes the comfort of classic fried chicken and adds a delightful twist with a hint of dill that elevates the flavor to a whole new level. Imagine sinking your teeth into juicy, tender chicken, perfectly coated in a luscious dill-flavored crust. It’s not just food; it’s an experience that brings back memories of gathering around the table with friends and family, sharing laughter and stories. Trust me, this crispy dill fried chicken will become a favorite in your household, just like it is in mine. So, let’s dive into this recipe and make some food magic happen!
There’s just something magical about the smell of crispy fried chicken wafting through the kitchen, isn’t there? I mean, can you really resist that golden, crunchy exterior? That’s why I’m so excited to share my recipe for Crispy Dill Fried Chicken. This dish takes the comfort of classic fried chicken and adds a delightful twist with a hint of dill that elevates the flavor to a whole new level. Imagine sinking your teeth into juicy, tender chicken, perfectly coated in a luscious dill-flavored crust. It’s not just food; it’s an experience that brings back memories of gathering around the table with friends and family, sharing laughter and stories. Trust me, this crispy dill fried chicken will become a favorite in your household, just like it is in mine. So, let’s dive into this recipe and make some food magic happen!
Ingredients for Crispy Dill Fried Chicken
To whip up this mouthwatering *Crispy Dill Fried Chicken*, you’ll need a few simple yet essential ingredients. Grab 4 chicken thighs, which are perfect for that juicy, tender bite. For marinating, you’ll want 1 cup of buttermilk; this is key for flavor and moisture. Next, gather 1 cup of all-purpose flour, which forms that irresistible crunchy crust. Don’t forget 2 tablespoons of dried dill, as this is what gives our chicken its unique flavor. You’ll also need 1 teaspoon each of garlic powder and onion powder, 1 teaspoon of salt, and 1/2 teaspoon of black pepper for seasoning. And of course, vegetable oil for frying is a must!
How to Prepare Crispy Dill Fried Chicken
Now, let’s get into the fun part – preparing that delicious *Crispy Dill Fried Chicken*! Follow these steps, and you’ll have a mouthwatering dish that’s sure to impress.
Step 1: Marinate the Chicken
First things first, you want to soak those chicken thighs in buttermilk for at least 2 hours. This step is crucial because it not only adds incredible flavor but also helps tenderize the chicken, making it juicy and delicious. If you can, let it marinate overnight for the best results!
Step 2: Prepare the Coating
While the chicken is soaking, let’s get the coating ready. In a mixing bowl, combine 1 cup of all-purpose flour with 2 tablespoons of dried dill, 1 teaspoon of garlic powder, 1 teaspoon of onion powder, 1 teaspoon of salt, and 1/2 teaspoon of black pepper. This mixture will create that lovely crunchy crust we’re after. Make sure everything is well combined for even flavor!
Step 3: Dredging the Chicken
Once your chicken has soaked up all that goodness, it’s time to dredge! Remove the chicken from the buttermilk, letting any excess drip off. Then, coat each thigh in the flour mixture, ensuring it’s fully covered. For an extra crunch, you can double dip: back into the buttermilk and then into the flour again. Trust me, it’s worth it!
Step 4: Fry the Chicken
Now comes the best part – frying! Heat vegetable oil in a frying pan over medium-high heat. You want enough oil to submerge the chicken about halfway. Carefully add the chicken thighs to the hot oil and fry for about 6-8 minutes on each side, or until they’re golden brown and cooked through. Keep an eye on them; you’re looking for that perfect crispy exterior!
Step 5: Drain and Serve
Once your chicken is beautifully golden, remove it from the oil and let it drain on paper towels to absorb any excess oil. This step is crucial for keeping that crust nice and crispy! Serve your *Crispy Dill Fried Chicken* hot, perhaps with a side of coleslaw or a fresh salad for a delightful meal!
Why You’ll Love This Recipe
Once you try my *Crispy Dill Fried Chicken*, you’ll understand why it’s a go-to in my kitchen! Here are just a few reasons to love it:
- Incredible Flavor: The unique dill twist elevates classic fried chicken, giving it a fresh, zesty taste that’s simply irresistible.
- Easy to Make: With just a few simple steps, you’ll have a mouthwatering dish that’s perfect for weeknight dinners or special gatherings.
- Versatile Serving Options: Pair it with coleslaw, a crisp salad, or even on a bun for a delicious chicken sandwich!
- Family-Friendly: Everyone loves crispy fried chicken, making it a sure hit with kids and adults alike.
Tips for Success
To ensure your *Crispy Dill Fried Chicken* turns out perfectly every time, here are a few tips to keep in mind!
- Don’t Rush the Marinade: Letting the chicken soak in buttermilk for at least 2 hours (or even overnight) is key to achieving that tender, juicy texture.
- Monitor Oil Temperature: Make sure your oil is hot enough before adding the chicken. If it’s too cold, you’ll end up with greasy chicken instead of that lovely crunch.
- Use Fresh Ingredients: For the best flavor, use fresh spices and high-quality chicken. It really makes a difference!
- Rest After Frying: Don’t skip the draining step! Letting the chicken rest on paper towels keeps that crispy coating intact.
Nutritional Information
When it comes to enjoying *Crispy Dill Fried Chicken*, it’s good to know what you’re putting on your plate. Each serving, which is one chicken thigh, contains approximately 320 calories. You’ll also find about 20 grams of fat, with 5 grams of that being saturated fat. The chicken is a great source of protein, packing in around 22 grams per serving. You’ll get about 18 grams of carbohydrates, including 1 gram of fiber and just 1 gram of sugar. And don’t forget, this dish has about 600 mg of sodium. Keep in mind, these values are estimates and can vary based on the specific ingredients used and cooking methods!
FAQ Section
Can I use chicken fillets instead of thighs?
Absolutely! You can use chicken fillets if you prefer, but keep in mind that they can be a bit drier than thighs. Thighs are more forgiving, staying juicy and flavorful even after frying. If you go with fillets, try to use boneless, skinless ones and adjust the cooking time for a shorter fry.
How can I make this dish gluten-free?
No problem! To make *Crispy Dill Fried Chicken* gluten-free, simply substitute the all-purpose flour with a gluten-free flour blend. Brands like Bob’s Red Mill or King Arthur Flour offer great options that will work perfectly for the coating!
What can I serve with Crispy Dill Fried Chicken?
This dish pairs wonderfully with a fresh side salad or some classic coleslaw. You could also serve it with mashed potatoes or even on a bun to make a delicious chicken sandwich. The options are endless!
How do I store leftovers?
To keep your fried chicken crispy, store leftovers in an airtight container in the fridge. When you’re ready to eat, reheat them in the oven rather than the microwave to maintain that crunchy texture!
Can I bake this chicken instead?
Yes, you can bake it for a lighter option! Preheat your oven to 400°F (200°C) and place the coated chicken on a baking sheet. Bake for about 25-30 minutes, flipping halfway through, until it’s golden and cooked through. Just keep in mind, it won’t be quite as crispy as frying!
Storage & Reheating Instructions
To keep your *Crispy Dill Fried Chicken* fresh and delicious, store any leftovers in an airtight container in the fridge. This helps maintain its flavor and texture! When you’re ready to enjoy leftovers, avoid the microwave if you want to keep that delightful crunch. Instead, preheat your oven to 375°F (190°C) and place the chicken on a baking sheet. Heat for about 10-15 minutes, or until warmed through and crispy again. This method allows the skin to regain its crunchiness while the chicken stays juicy. Enjoy every last bite!
Print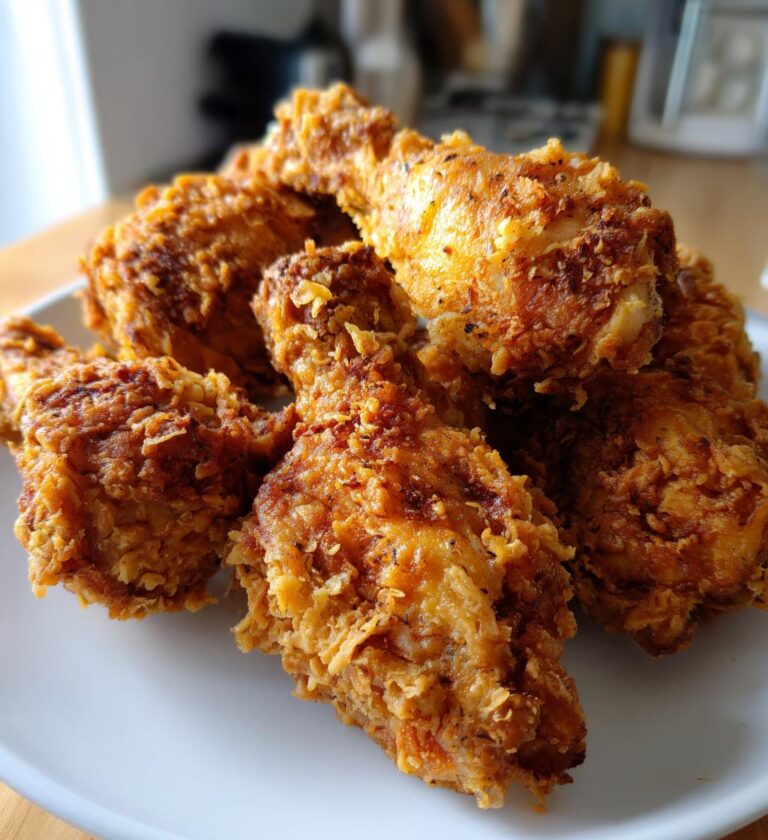
Crispy Dill Fried Chicken: 5 Steps to Flavorful Perfection
Crispy Dill Fried Chicken is a flavorful dish featuring tender chicken coated in a crunchy dill-flavored crust.
- Total Time: 2 hours 16 minutes
- Yield: 4 servings 1x
Ingredients
- 4 chicken thighs
- 1 cup buttermilk
- 1 cup all-purpose flour
- 2 tablespoons dried dill
- 1 teaspoon garlic powder
- 1 teaspoon onion powder
- 1 teaspoon salt
- 1/2 teaspoon black pepper
- Vegetable oil for frying
Instructions
- Soak chicken thighs in buttermilk for at least 2 hours.
- In a bowl, mix flour, dill, garlic powder, onion powder, salt, and pepper.
- Remove chicken from buttermilk and dredge in the flour mixture.
- Heat oil in a frying pan over medium-high heat.
- Fry chicken for 6-8 minutes per side until golden brown and cooked through.
- Drain on paper towels before serving.
Notes
- For extra crunch, double dip the chicken in buttermilk and flour.
- Serve with a side salad or coleslaw.
- Store leftovers in an airtight container in the fridge.
- Prep Time: 2 hours
- Cook Time: 16 minutes
- Category: Main Course
- Method: Frying
- Cuisine: American
- Diet: Gluten Free
Nutrition
- Serving Size: 1 thigh
- Calories: 320
- Sugar: 1g
- Sodium: 600mg
- Fat: 20g
- Saturated Fat: 5g
- Unsaturated Fat: 15g
- Trans Fat: 0g
- Carbohydrates: 18g
- Fiber: 1g
- Protein: 22g
- Cholesterol: 90mg
Keywords: Crispy Dill Fried Chicken, Fried Chicken, Dill Chicken