
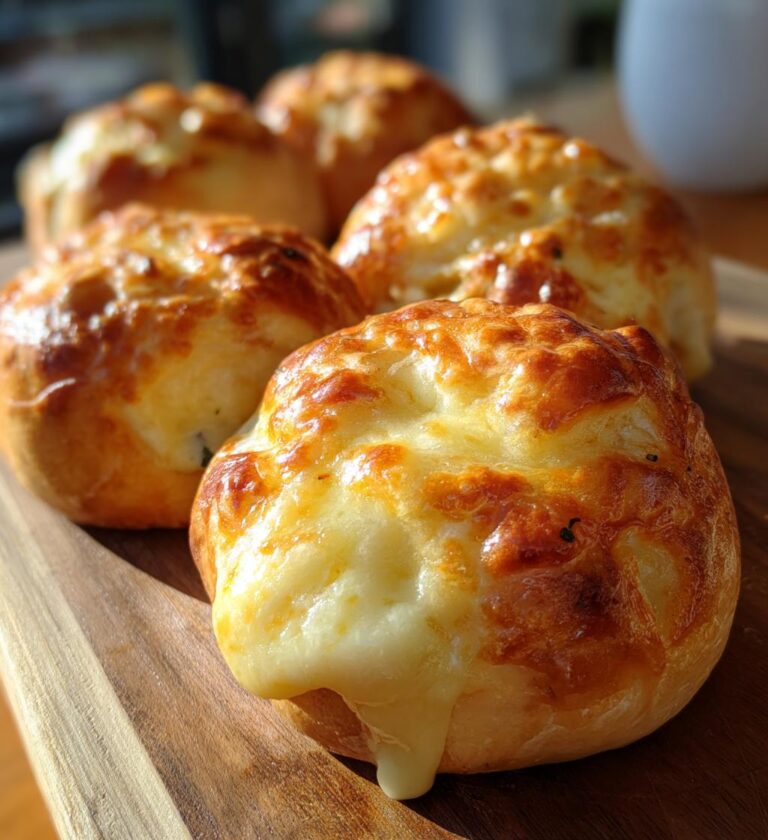
Oh my goodness, let me tell you about the joy that is cheesy garlic bombs! These fluffy rolls are like little pillows of heaven that burst with gooey cheese and a kick of garlic flavor. Honestly, is there anything better than biting into one of these warm, cheesy delights? They’re perfect for any occasion, whether you’re hosting a game night, looking for a quick appetizer for a dinner party, or just wanting to treat yourself on a cozy night in.
What I absolutely love about cheesy garlic bombs is their versatility. You can serve them warm right out of the oven, and they’ll disappear in no time, trust me! You can even play around with the flavors by adding herbs or spices to mix things up. Imagine the aroma wafting through your kitchen as they bake—your friends and family will be flocking to the table! They’re super easy to whip up, and the best part? You’ll impress everyone with minimal effort. So, let’s dive into how to make these irresistible bites of cheesy goodness!
Ingredients List
To whip up these delightful cheesy garlic bombs, you’ll need the following ingredients:
- 2 cups all-purpose flour: This forms the base of your fluffy rolls.
- 1 cup shredded mozzarella cheese: The star of the show! It melts beautifully and gives that gooey texture.
- 1/2 cup milk: Adds moisture and helps bind everything together.
- 1/4 cup unsalted butter, melted: This gives richness and flavor, plus it helps create that tender crumb.
- 2 teaspoons garlic powder: For that delicious garlic flavor that makes these bombs irresistible!
- 1 teaspoon salt: Essential for balancing the flavors.
- 1 tablespoon sugar: Just a touch to enhance the overall taste.
- 1 tablespoon baking powder: This is key for making your rolls puff up nicely.
- 1 egg: Helps to bind the ingredients and adds richness.
- 1/4 cup parsley, chopped: Adds a fresh touch and a pop of color!
Make sure you have everything ready to go before you start—trust me, it makes the process so much smoother! Let’s get cooking!
How to Prepare Cheesy Garlic Bombs
Now that you’ve got all your ingredients ready, let’s jump right into making these cheesy garlic bombs! Don’t worry, the process is super straightforward, and I’m here to guide you every step of the way. Just follow my lead, and soon you’ll have these delicious rolls baking in your oven.
Step-by-Step Instructions
- Preheat your oven: First thing’s first, preheat your oven to 375°F (190°C). This ensures that when your cheesy garlic bombs go in, they’ll start baking immediately, creating that soft, fluffy texture we all love.
- Mix the dry ingredients: In a large mixing bowl, combine the all-purpose flour, baking powder, garlic powder, sugar, and salt. Use a whisk to blend everything together evenly. This is super important because it ensures the baking powder gets evenly distributed, which helps your rolls rise perfectly!
- Add the wet ingredients: Next, pour in the melted butter, milk, and crack in the egg. Grab a spatula or a wooden spoon and stir until everything is just combined. Don’t worry if it looks a little lumpy—that’s totally normal! You want to avoid overmixing to keep those rolls light and fluffy.
- Fold in the cheese and parsley: Now comes the fun part! Gently fold in the shredded mozzarella cheese and chopped parsley. You should start to smell that delicious garlic aroma wafting through the air. Just be careful not to overmix again; we want those cheesy chunks to stay intact!
- Form the balls: With your hands, grab small portions of the dough and roll them into balls, about the size of a golf ball. Place them on a baking sheet lined with parchment paper, leaving some space between each one. They’ll puff up as they bake, and you want them to have room to spread out!
- Bake to perfection: Pop the tray in the preheated oven and bake for 15-20 minutes, or until they’re golden brown and have that beautiful, inviting aroma. Keep an eye on them during the last few minutes—you don’t want to miss that moment when they turn that lovely golden color!
- Serve warm: Once they’re out of the oven, let them cool for just a minute (if you can resist the temptation) before serving. These cheesy garlic bombs are best enjoyed warm, right out of the oven, so get ready to dig in!
And there you have it! Making cheesy garlic bombs is as easy as pie, I promise. Just take your time, enjoy the process, and before you know it, you’ll have a tray full of these irresistible bites to share (or not!).
Why You’ll Love Cheesy Garlic Bombs
- Unmatched Flavor: The combination of gooey mozzarella and savory garlic creates a flavor explosion in every bite. Trust me, it’s a taste you won’t forget!
- Super Easy to Make: With just a handful of ingredients and simple steps, you can whip these up in no time. Perfect for both novice and seasoned cooks!
- Perfect for Any Occasion: Whether it’s a casual family dinner, a fancy gathering, or game night with friends, these cheesy garlic bombs are a hit every time!
- Versatile Appetizer: You can serve them plain, dip them in marinara sauce, or even mix in your favorite herbs for a personalized touch. The possibilities are endless!
- Make Ahead: You can prepare the dough ahead of time and bake them fresh when you’re ready. This makes hosting a breeze!
- Kid-Friendly: Kids love cheesy snacks, and these bombs are no exception. They disappear quickly at any gathering!
Honestly, once you try these cheesy garlic bombs, you’ll be wondering why you didn’t make them sooner! They truly are the ultimate comfort food that brings everyone together.
Tips for Success
To make sure your cheesy garlic bombs turn out perfectly every time, I’ve got some handy tips to share! Trust me, a little prep can go a long way in achieving that fluffy, gooey perfection.
- Measure Accurately: Baking is all about precision! Make sure to measure your flour properly—spoon it into the measuring cup and level it off. Packing it down can lead to dense rolls, and we definitely want them light and airy.
- Room Temperature Ingredients: Before you start, let your milk and egg sit out for a bit to reach room temperature. This helps everything blend together more smoothly, creating a better dough consistency.
- Don’t Overmix: I can’t stress this enough! It’s totally okay if your dough looks a bit lumpy. Overmixing can lead to tough rolls, and we want them to be soft and fluffy. Just mix until everything is combined!
- Watch the Oven: Every oven is a little different, so keep an eye on your cheesy garlic bombs as they bake. They can go from perfect to overdone in a blink! Once they’re golden brown and smelling divine, they’re ready to come out.
- Use Parchment Paper: Line your baking sheet with parchment paper to prevent sticking and make cleanup a breeze. Plus, it helps achieve that lovely golden bottom on your rolls!
- Let Them Cool Slightly: I know it’s hard to resist the smell, but letting them cool for just a minute before diving in helps the cheese set a bit. You’ll thank me later when you don’t burn your tongue on molten cheese!
- Experiment with Flavors: Don’t be afraid to get creative! Add in some herbs like oregano or thyme, or even throw in some cooked bacon bits for an extra savory kick. The beauty of these bombs is that they’re a blank canvas for your flavor imagination!
With these tips in your back pocket, you’re all set to make a batch of cheesy garlic bombs that will wow your family and friends. Happy baking!
Variations on Cheesy Garlic Bombs
Now, let’s talk about how you can put your own spin on these cheesy garlic bombs! The beauty of this recipe is its versatility, allowing you to get creative and mix in flavors that suit your taste buds. Here are some fun variations to consider:
- Herb-Infused Bombs: Want to add a fresh twist? Try mixing in some chopped fresh herbs like rosemary, thyme, or basil. These will give your cheesy garlic bombs a delightful aroma and flavor that’s perfect for spring gatherings!
- Spicy Kick: If you love a little heat, toss in some crushed red pepper flakes or diced jalapeños into the dough. This adds an exciting kick that pairs beautifully with the cheesy goodness.
- Cheese Medley: While mozzarella is classic, why not mix it up? Incorporate a blend of cheeses such as cheddar, gouda, or pepper jack for a richer, more complex flavor profile. Each bite will be a delightful surprise!
- Stuffed Centers: For an extra indulgent treat, consider stuffing the centers of your bombs with cream cheese or ricotta before baking. The creamy center will melt into deliciousness as they bake, creating a gooey surprise!
- Sweet Garlic Bombs: Feeling adventurous? You can create a sweet version by adding a tablespoon of honey or maple syrup into the dough and a sprinkle of cinnamon. These would be delightful as a brunch treat or dessert!
- Meaty Goodness: For those who enjoy a heartier option, fold in some cooked and crumbled sausage or bacon bits. These savory additions will elevate your cheesy garlic bombs to a whole new level of deliciousness!
Don’t be afraid to experiment! Each variation brings something unique to the table, and I can’t wait for you to discover your favorite version. So grab your ingredients, get creative, and have fun in the kitchen!
Storage & Reheating Instructions
Let’s face it, if you’re lucky enough to have leftovers of these cheesy garlic bombs, you want to make sure they stay as delicious as when they first came out of the oven! Here’s how to store them properly and reheat them for maximum enjoyment.
Storing Leftovers: Once your cheesy garlic bombs have cooled down, place them in an airtight container. This helps keep them fresh and prevents them from drying out. You can store them at room temperature for up to two days, but if you want to keep them longer, pop them in the fridge. They’ll last about a week in there. Just make sure they’re in a sealed container to keep that flavor intact!
Freezing for Later: If you know you won’t finish them all right away, freeze those little beauties! Wrap each bomb individually in plastic wrap or place them in a freezer-safe bag. They can hang out in the freezer for up to three months. When you’re ready to enjoy them again, just pull them out and let them thaw in the fridge overnight.
Reheating Your Cheesy Garlic Bombs: To bring your cheesy garlic bombs back to life, the oven is your best friend! Preheat your oven to 350°F (175°C). Place the bombs on a baking sheet and cover them with aluminum foil to prevent them from browning too much. Heat for about 10-15 minutes, or until they’re warmed through and that cheesy goodness is ooey-gooey again. Trust me, the oven method keeps them fluffy and soft!
If you’re in a pinch for time, you can also pop them in the microwave for about 20-30 seconds. Just keep an eye on them so they don’t get too hot, or you might end up with molten cheese splatters. No one wants that mess!
So, there you go! With these storage and reheating tips, you can enjoy your cheesy garlic bombs even after the first day. They’re truly irresistible, no matter how many times you warm them up!
Nutritional Information
Now, I know you might be wondering about the nutritional breakdown of these cheesy garlic bombs. It’s always good to have a sense of balance, right? So here’s an estimated nutritional profile for one cheesy garlic bomb, based on common ingredient values:
- Calories: 150
- Fat: 7g
- Saturated Fat: 4g
- Unsaturated Fat: 2g
- Trans Fat: 0g
- Cholesterol: 30mg
- Sodium: 200mg
- Carbohydrates: 18g
- Fiber: 1g
- Sugar: 1g
- Protein: 4g
Keep in mind, these values are estimates and can vary based on the specific ingredients you use, especially if you decide to mix in your favorite cheeses or add extra ingredients. But trust me, knowing this data can help you enjoy these cheesy delights guilt-free! Happy indulging!
FAQ Section
Q1. Can I make cheesy garlic bombs ahead of time?
Absolutely! You can prepare the dough in advance and store it in the fridge for a day. Just remember to let it come to room temperature before shaping and baking. This way, you can have freshly baked cheesy garlic bombs with minimal effort when you’re ready to serve!
Q2. What can I serve with cheesy garlic bombs?
These little delights are perfect on their own, but they also pair wonderfully with marinara sauce, ranch dressing, or even a spicy aioli for dipping. You can get creative and serve them alongside a fresh salad or your favorite soup for a comforting meal.
Q3. Can I use different types of cheese?
Definitely! While mozzarella is a classic choice, feel free to experiment with other cheeses like cheddar, gouda, or pepper jack. Each type will bring its own unique flavor and texture to the cheesy garlic bombs, making them even more exciting!
Q4. How do I know when my cheesy garlic bombs are done baking?
Great question! You’ll want to look for a golden brown color on the tops of the bombs. A good test is to gently press the top; it should spring back slightly. If you want to be extra sure, you can use a toothpick to check for doneness—moist crumbs should cling to it, but not wet batter.
Q5. Can I freeze cheesy garlic bombs?
Yes, you can! Just wrap each bomb individually in plastic wrap or place them in a freezer-safe bag. They can stay in the freezer for up to three months. When you’re ready to enjoy them again, just thaw in the fridge overnight and reheat in the oven for the best results.
Q6. What if my dough is too sticky?
If your dough feels too sticky to handle, don’t panic! Just sprinkle a little extra flour on your hands and the work surface while shaping the balls. Remember, it’s better to add flour gradually than to risk tough rolls by overmixing. A little stickiness is normal!
Q7. Can I add additional herbs or spices to the recipe?
Absolutely! This recipe is so flexible. You can add fresh herbs like thyme or oregano for an extra flavor boost, or even toss in some red pepper flakes if you like a bit of heat. Get creative and make these cheesy garlic bombs your own!
Cheesy Garlic Bombs: 7 Irresistible Ways to Indulge
Cheesy garlic bombs are fluffy rolls filled with gooey cheese and garlic flavor.
- Total Time: 35 minutes
- Yield: 12 servings 1x
Ingredients
- 2 cups all-purpose flour
- 1 cup shredded mozzarella cheese
- 1/2 cup milk
- 1/4 cup unsalted butter, melted
- 2 teaspoons garlic powder
- 1 teaspoon salt
- 1 tablespoon sugar
- 1 tablespoon baking powder
- 1 egg
- 1/4 cup parsley, chopped
Instructions
- Preheat your oven to 375°F (190°C).
- In a bowl, mix flour, baking powder, garlic powder, sugar, and salt.
- Add melted butter, milk, and egg. Stir until combined.
- Fold in mozzarella cheese and parsley.
- Form small balls from the dough and place on a baking sheet.
- Bake for 15-20 minutes until golden brown.
- Serve warm and enjoy.
Notes
- Store leftovers in an airtight container.
- Reheat in the oven for best results.
- Feel free to add herbs for extra flavor.
- Prep Time: 15 minutes
- Cook Time: 20 minutes
- Category: Appetizer
- Method: Baking
- Cuisine: American
- Diet: Vegetarian
Nutrition
- Serving Size: 1 bomb
- Calories: 150
- Sugar: 1g
- Sodium: 200mg
- Fat: 7g
- Saturated Fat: 4g
- Unsaturated Fat: 2g
- Trans Fat: 0g
- Carbohydrates: 18g
- Fiber: 1g
- Protein: 4g
- Cholesterol: 30mg
Keywords: cheesy garlic bombs, garlic rolls, cheesy rolls