Oh, let me tell you about my absolute favorite dish to whip up in the kitchen—Chicken Strips! Seriously, there’s nothing quite like the crunch of that golden-brown coating and the tender, juicy chicken inside. It’s a dish that brings everyone together, from the littlest family members to the most discerning adults. You know, the kind of meal that makes you feel like a culinary superstar, even if you’re just frying chicken at home!
What I love most about making Chicken Strips is how simple yet satisfying they are. You take a pound of chicken fillet, cut it into strips, and then you coat it in a beautifully crispy mixture of flour, eggs, and breadcrumbs. The aroma wafting through the kitchen while they fry is simply irresistible. Trust me, once you try making them from scratch, you’ll never want to go back to store-bought! Plus, they’re so versatile. Pair them with your favorite dipping sauce, and you’ve got an instant crowd-pleaser. So, let’s dive into this delicious adventure together!
Ingredients List
Gathering the right ingredients is key to making the best Chicken Strips ever! Here’s what you’ll need:
- 1 pound chicken fillet: Cut into strips to ensure they cook evenly and stay tender.
- 1 cup flour: This is your base for that crunchy coating. I always sift mine to make it light and airy!
- 2 eggs: Beaten, they’ll help the breadcrumbs stick beautifully to the chicken.
- 1 cup breadcrumbs: For that ultimate crispy texture. Panko breadcrumbs work wonders if you want extra crunch!
- 1 teaspoon salt: A must for flavor. You can adjust to taste, but don’t skip this step!
- 1 teaspoon pepper: Freshly cracked if you can, it adds a nice bite.
- 1 teaspoon paprika: This gives your Chicken Strips a lovely color and a hint of smokiness.
- Oil for frying: Enough to submerge the chicken strips halfway; I love using vegetable or canola oil for frying.
With these ingredients in hand, you’re all set to make some mouthwatering Chicken Strips that everyone will love! Let’s get cooking!
How to Prepare Chicken Strips
Now that you’ve got your ingredients ready, let’s dive into the fun part—making those delicious Chicken Strips! I promise, it’s easier than it looks and so rewarding. Here’s a step-by-step guide to help you every step of the way.
Preparing the Chicken
First things first, let’s prep that chicken! Take your pound of chicken fillet and place it on a cutting board. With a sharp knife, cut the chicken into strips about 1 inch wide. It’s really important to make sure your knife is sharp for clean cuts—no one likes ragged edges! If you want extra tenderness, you can pound the chicken slightly to even out the thickness. This way, it cooks evenly and stays juicy. Once you’ve cut all the strips, set them aside while you get your breading station ready.
Setting Up the Breading Station
Creating a well-organized breading station makes the whole process smooth and enjoyable. I like to line up three shallow dishes in a row. In the first dish, add your seasoned flour (remember to mix in that salt, pepper, and paprika!). In the second dish, crack and beat the two eggs until they’re nice and frothy. For the last dish, pour in the breadcrumbs. If you’re using panko for extra crunch, now’s the time! Trust me, having everything lined up will save you from a messy kitchen and help you coat those chicken strips like a pro!
Breading the Chicken Strips
Now comes the fun part—breading the chicken! Take one chicken strip and dip it into the flour first, making sure to coat it evenly. Give it a little shake to remove any excess flour. Next, dip it into the beaten egg, letting any extra drip off. Finally, roll it in the breadcrumbs, pressing gently to ensure they stick well. Repeat this process for all chicken strips. I like to place the breaded strips on a clean plate or tray while I finish the rest. It’s like a little assembly line, and trust me, it’s all about the rhythm!
Frying the Chicken Strips
Oh, it’s almost time to enjoy those crispy Chicken Strips! Heat about an inch of oil in a frying pan over medium heat. You want it hot enough that a breadcrumb sizzles when it hits the oil, but not so hot that it burns. Carefully place a few chicken strips in the oil, being mindful not to overcrowd the pan. Fry them for about 4-5 minutes on each side until they’re golden brown and cooked through. You can use a meat thermometer to check for doneness—165°F is your magic number! Once they’re ready, use a slotted spoon to transfer them to a plate lined with paper towels to drain any excess oil.
Serving Suggestions
Now that your Chicken Strips are all golden and crispy, it’s time to serve them up! I love to present them on a big platter with a variety of dipping sauces. Some of my favorites are classic ranch, zesty honey mustard, or even a spicy buffalo sauce for those who like a kick! You can also add a side of fresh veggies or fries to make it a complete meal. Trust me, once you set this out, everyone will be diving in!
Why You’ll Love This Recipe
- Quick Preparation: With just 15 minutes of prep time, you can have delicious Chicken Strips on the table in no time!
- Easy Cooking: Frying these strips is straightforward, making it a perfect recipe for cooks of all skill levels.
- Family-Friendly: Kids and adults alike adore Chicken Strips, making them a surefire hit at any meal or gathering.
- Customizable: You can easily adjust the seasoning or try different breadcrumbs to suit your taste preferences.
- Perfect for Dipping: Serve them with a variety of sauces, and everyone can have their favorite flavor combination!
- Leftover Friendly: Any leftovers can be stored and reheated, making for a quick meal later in the week!
Tips for Success
To make sure your Chicken Strips turn out absolutely perfect every time, I’ve got a few pro tips that I swear by! These little tricks will elevate your dish and ensure that every bite is as delicious as possible.
Marinate for Extra Tenderness
If you have a bit of time, consider marinating your chicken strips in buttermilk for a few hours—or even overnight! This not only adds flavor but also helps tenderize the meat, making it juicy and flavorful. Just make sure to drain the excess buttermilk before breading!
Keep the Oil at the Right Temperature
Temperature is everything when frying! Too hot, and you’ll burn the coating before the chicken cooks through; too cool, and you’ll end up with greasy strips. I recommend keeping your oil around 350°F. If you don’t have a thermometer, you can test it by dropping in a small piece of bread; it should sizzle and turn golden brown in about 60 seconds!
Don’t Overcrowd the Pan
When it comes to frying, less is more! Fry your chicken strips in batches to avoid crowding the pan. This way, the temperature of the oil stays consistent, and you get that beautiful golden color all over. Plus, it makes flipping them so much easier!
Experiment with Seasonings
Feel free to get creative with your seasonings! While salt, pepper, and paprika are classic, you can also add garlic powder, onion powder, or even a pinch of cayenne for some heat. Mix it up and find your favorite flavor combination!
Let Them Rest
Once you’ve fried your Chicken Strips, allow them to rest for a few minutes on the paper towel-lined plate. This helps keep them crispy while they cool slightly, and prevents that rush of steam that can make them soggy.
With these tips in your back pocket, you’re all set to make Chicken Strips that’ll impress everyone around the table! Happy frying!
Storage & Reheating Instructions
So, you’ve made a batch of those mouthwatering Chicken Strips and now you’ve got some leftovers? No worries! Storing them properly is key to keeping that delicious crunch intact for your next meal.
First things first, once your Chicken Strips have cooled completely, transfer them to an airtight container. I love using a glass container for this, but any airtight option works well. Just make sure they’re not stacked too high; you want to avoid any squishing that could ruin that crispy coating!
Store your Chicken Strips in the refrigerator, where they’ll stay fresh for up to 3 days. If you think you won’t get to them in that time, you can also freeze them! Just layer them between sheets of parchment paper in a freezer-safe bag or container, and they’ll keep for about 2-3 months. When you’re ready to enjoy them again, just thaw them in the fridge overnight before reheating.
Now, let’s talk reheating! To keep that crispy goodness, I recommend using the oven. Preheat it to 375°F (190°C) and spread the Chicken Strips out on a baking sheet lined with parchment paper. Bake them for about 10-15 minutes, flipping them halfway through, until they’re heated through and crispy again. You can also use an air fryer for even quicker results—just pop them in at 350°F for about 5-7 minutes!
Avoid using the microwave if you can, as that tends to make them a bit soggy. Trust me, you’ll want to savor that crunch! With these storage and reheating tips, your Chicken Strips will taste just as good as the day you made them!
Nutritional Information
Now that you’re ready to dive into those delicious Chicken Strips, let’s talk about the nutritional information! It’s always good to know what you’re munching on, right? Keep in mind that these values are estimates and can vary based on the specific ingredients you use and portion sizes. Here’s a breakdown per serving:
- Calories: 350
- Fat: 15g
- Saturated Fat: 3g
- Unsaturated Fat: 10g
- Trans Fat: 0g
- Cholesterol: 70mg
- Sodium: 800mg
- Carbohydrates: 30g
- Fiber: 2g
- Sugar: 1g
- Protein: 25g
With a good balance of protein and flavor, these Chicken Strips make for a hearty meal. Whether you’re serving them for dinner or enjoying them as a snack, you’ll know you’re making a satisfying choice!
FAQ Section
Can I use chicken thighs instead of fillets?
Absolutely! Using chicken thighs instead of fillets can bring a whole new level of flavor to your Chicken Strips. Thighs are generally juicier and more forgiving when it comes to cooking, so they can be a great choice if you prefer a richer taste. Just keep in mind they may take a minute longer to cook through, so make sure to check for that perfect internal temperature of 165°F!
What dipping sauces pair well with Chicken Strips?
The possibilities are endless when it comes to dipping sauces for Chicken Strips! Here are some crowd-pleasers:
- Ranch Dressing: A classic choice that never disappoints.
- Honey Mustard: Sweet and tangy; it’s a match made in heaven!
- Buffalo Sauce: For those who like a little heat, this spicy option is perfect.
- BBQ Sauce: Smoky and sweet, it adds a nice twist to your strips.
- Sweet and Sour Sauce: A fun, fruity dip that pairs surprisingly well!
How do I make Chicken Strips healthier?
If you’re looking to lighten things up a bit, consider a few modifications! You can use whole wheat flour and whole grain breadcrumbs for a healthier coating. Another option is to bake them instead of frying, which cuts down on the oil. You can also try marinating the chicken in yogurt instead of buttermilk for added tenderness without the extra calories. Trust me, you’ll still get a delicious crunch!
Can I bake Chicken Strips instead of frying?
Yes, you can definitely bake Chicken Strips if you’re looking for a healthier alternative! Preheat your oven to 400°F (200°C) and place your breaded strips on a parchment-lined baking sheet. Bake them for about 15-20 minutes, flipping halfway through, until they’re golden brown and cooked through. While they won’t have that deep-fried crunch, they’ll still be delicious and a bit lighter!
How long can I store leftovers?
If you’ve got some leftover Chicken Strips (lucky you!), store them in an airtight container in the refrigerator for up to 3 days. If you want to keep them longer, freeze them! Just make sure to layer them with parchment paper and store them in a freezer-safe bag. They’ll stay good for about 2-3 months. When you’re ready to enjoy them again, thaw in the fridge overnight and reheat for that crispy goodness!
Print
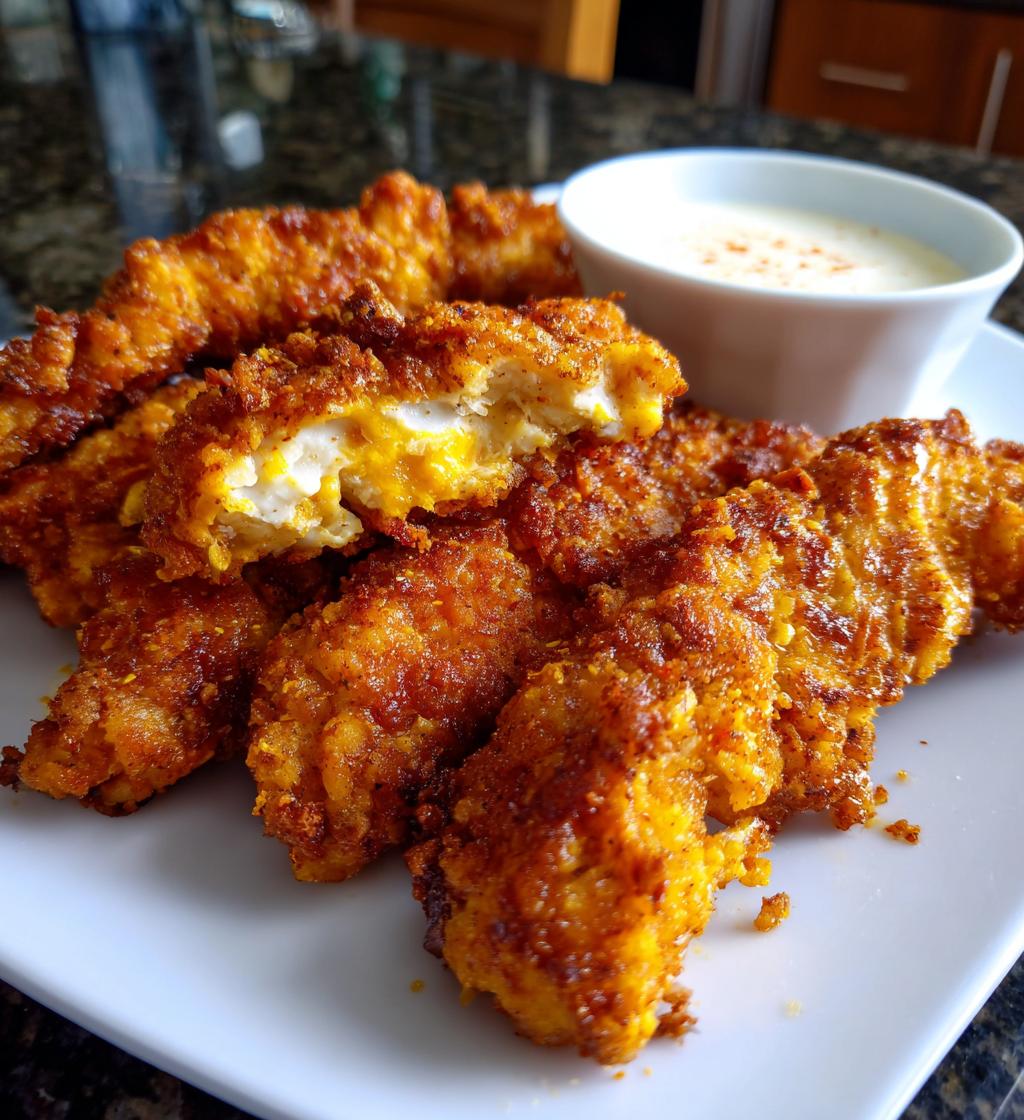
Chicken Strips: 7 Irresistibly Crispy Recipes to Try
Chicken strips are tender pieces of chicken fillet, coated and fried until golden brown.
- Total Time: 25 minutes
- Yield: 4 servings 1x
Ingredients
- 1 pound chicken fillet, cut into strips
- 1 cup flour
- 2 eggs
- 1 cup breadcrumbs
- 1 teaspoon salt
- 1 teaspoon pepper
- 1 teaspoon paprika
- Oil for frying
Instructions
- Prepare the chicken by cutting it into strips.
- Set up a breading station with flour, beaten eggs, and breadcrumbs.
- Season the flour with salt, pepper, and paprika.
- Dip each chicken strip in flour, then egg, and finally breadcrumbs.
- Heat oil in a frying pan over medium heat.
- Fry the chicken strips until golden brown and cooked through, about 4-5 minutes per side.
- Drain on paper towels and serve hot.
Notes
- For extra flavor, marinate chicken strips in buttermilk for a few hours before breading.
- Serve with your favorite dipping sauces.
- Store leftovers in an airtight container in the refrigerator.
- Prep Time: 15 minutes
- Cook Time: 10 minutes
- Category: Main Course
- Method: Frying
- Cuisine: American
- Diet: Low Fat
Nutrition
- Serving Size: 1 serving
- Calories: 350
- Sugar: 1g
- Sodium: 800mg
- Fat: 15g
- Saturated Fat: 3g
- Unsaturated Fat: 10g
- Trans Fat: 0g
- Carbohydrates: 30g
- Fiber: 2g
- Protein: 25g
- Cholesterol: 70mg
Keywords: Chicken Strips, Fried Chicken, Chicken Recipe