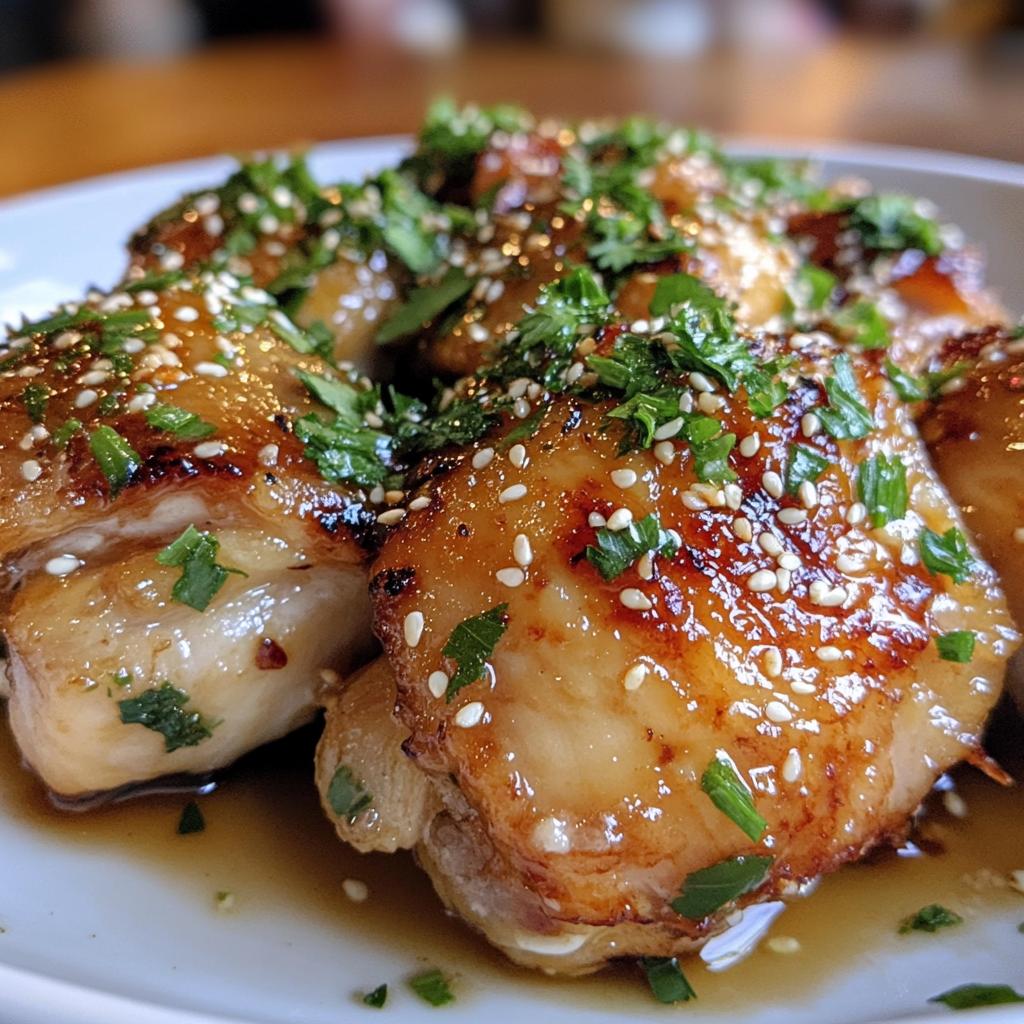
Oh, let me tell you about the first time I stumbled upon *Crispy Soy Chicken*! It was one of those rainy evenings when I just wanted something warm and comforting. I flipped through a cookbook I’d borrowed from a friend, and there it was—a mouthwatering picture of chicken coated in a golden, crunchy crust. I had to try it! The combination of soy sauce, honey, garlic, and ginger in the marinade made my mouth water just thinking about it. And let me tell you, when I took that first bite, I was hooked! The chicken was juicy on the inside and crispy on the outside, creating a delightful contrast that kept me going back for more. It quickly became a family favorite, perfect for weeknight dinners or special occasions. Trust me, once you try this dish, you’ll understand why it holds a special place in my heart and my kitchen!
Ingredients List
Gathering the right ingredients is key to making the best *Crispy Soy Chicken*. Here’s what you’ll need:
- 4 chicken thighs, boneless and skinless for easy cooking
- 1/4 cup soy sauce, preferably low sodium for better control over saltiness
- 2 tablespoons honey, to add a touch of sweetness that balances the soy sauce
- 1 tablespoon garlic, minced, because we all know garlic makes everything better
- 1 tablespoon ginger, grated, for that lovely zing
- 1 cup breadcrumbs, panko works great here for extra crunch
- 1/2 cup all-purpose flour, to create a nice base for the coating
- 2 large eggs, beaten, to help the breadcrumbs stick
- Salt and pepper to taste, because seasoning is everything
- Oil for frying, enough to fill your pan about an inch deep for that perfect fry
Make sure your ingredients are fresh; it really makes a difference in flavor! You’re going to love the way these come together!
How to Prepare Crispy Soy Chicken
Now, let’s dive into the steps that will take your chicken from ordinary to absolutely irresistible! Making *Crispy Soy Chicken* is straightforward, and I promise you’re going to enjoy every moment of it. Ready? Let’s go!
Step 1: Marinate the Chicken
The marination is where all the magic begins. Grab a bowl and mix together the soy sauce, honey, minced garlic, and grated ginger. This blend is what makes the chicken so flavorful! Add the chicken thighs, ensuring they’re completely coated in that beautiful marinade. Cover it up and let it hang out in the fridge for at least 30 minutes. If you have more time, letting it marinate for a couple of hours really enhances the flavor! Just don’t forget to take it out about 15 minutes before cooking so it can come to room temperature.
Step 2: Prepare the Coating
While the chicken is marinating, it’s time to set up your coating station! In one bowl, place the flour, and season it with a little salt and pepper. In another bowl, beat the eggs until they’re nice and frothy. Finally, pour your breadcrumbs into a third bowl—if you’re using panko, you’ll get that extra crunch we all love! Now, take each marinated chicken thigh, first coating it in the flour, then dipping it into the beaten eggs, and finally, rolling it in the breadcrumbs until it’s nicely covered. This layering is key for that perfect crispy texture!
Step 3: Fry the Chicken
Alright, let’s get frying! Heat your oil in a frying pan over medium heat. You want the oil to be hot but not smoking—about 350°F is ideal. Carefully place your coated chicken thighs in the pan, making sure not to overcrowd them; you want them to fry evenly. Cook for about 5-7 minutes on each side until they’re golden brown and cooked through. You’ll know they’re done when they’ve reached an internal temperature of 165°F. Oh, that sizzle sound is music to my ears!
Step 4: Drain and Serve
Once your chicken is beautifully golden and crispy, carefully remove it from the oil and place it on a plate lined with paper towels. This step is crucial—it helps drain off any excess oil, keeping your chicken crispy! Now, it’s time to serve. I love pairing this with some steamed rice and a side of veggies, or even a fresh salad. You can also whip up a quick dipping sauce for an extra flavor kick. Enjoy every bite of your *Crispy Soy Chicken* masterpiece!
Why You’ll Love This Recipe
- Quick Preparation: With just 30 minutes of marinating and 15 minutes of cooking, you can have a delicious meal on the table in under an hour!
- Easy Cooking: This recipe is perfect for all skill levels. Whether you’re a seasoned chef or a kitchen newbie, you’ll find it super simple to follow.
- Flavorful Taste: The combination of soy sauce, honey, garlic, and ginger creates a mouthwatering flavor profile that’s hard to resist.
- Crispy Texture: The double coating of flour, egg, and breadcrumbs results in a satisfying crunch that contrasts beautifully with the juicy chicken.
- Versatile Pairings: Serve it with your favorite sides, whether it’s rice, veggies, or a crisp salad. The possibilities are endless!
- Family Favorite: This dish is sure to impress everyone at the dinner table, making it a great option for weeknight meals or special occasions.
Tips for Success
Here are some of my tried-and-true tips to ensure your *Crispy Soy Chicken* turns out perfectly every time!
- Marination Time: Don’t rush the marinating process! If you can, let the chicken soak up those flavors for at least an hour or even overnight. The longer it marinates, the tastier it becomes!
- Use Fresh Ingredients: Fresh garlic and ginger make a world of difference. If you can, grate your ginger right before using it to capture all those aromatic oils!
- Perfect Frying Temperature: Keep an eye on your oil temperature. Too hot, and the outside will burn while the inside stays raw. Too cold, and your chicken will absorb too much oil. Use a thermometer for best results, or drop a small piece of bread in the oil—if it sizzles and browns in about 60 seconds, you’re good to go!
- Don’t Overcrowd the Pan: Fry in batches if you’re making a lot! Giving the chicken space allows for even cooking and that coveted crispy crust.
- Use Paper Towels: Always drain your fried chicken on paper towels. It helps keep that crispiness intact by absorbing excess oil.
- Experiment with Coatings: Feel free to mix it up! Try adding some spices to your breadcrumbs or using different types of flour for a unique twist. Panko is my go-to for that extra crunch, but you can also use crushed cornflakes for a fun variation!
- Serve Immediately: Enjoy your *Crispy Soy Chicken* hot! It’s at its best when served fresh out of the pan. If you do have leftovers, store them in an airtight container and reheat in the oven to restore some of that crispy goodness.
With these tips, you’ll be well on your way to making the most delicious *Crispy Soy Chicken* that’ll impress everyone at your table! Happy cooking!
Variations
One of the best things about *Crispy Soy Chicken* is how easy it is to customize! Here are some fun variations you can try to keep things exciting:
- Spicy Soy Marinade: If you love a little heat, add some red pepper flakes or sriracha to your marinade! You can adjust the amount based on your spice tolerance, but trust me, a little kick can elevate the dish!
- Citrus Twist: For a refreshing twist, try adding the zest and juice of a lime or orange to your marinade. The citrus adds a bright flavor that complements the savory notes beautifully!
- Herb-Infused Marinade: Mix in some fresh herbs like cilantro or basil into your marinade. They’ll add a lovely fragrance and a burst of flavor. Just chop them finely before adding them in!
- Crunchy Alternatives: While panko breadcrumbs are my favorite, you can also experiment with crushed cornflakes or even crushed tortilla chips for a different texture and flavor. They’ll give your chicken a unique crunch!
- Gluten-Free Option: For a gluten-free version, swap out regular soy sauce for tamari and use gluten-free breadcrumbs or ground almonds as your coating. It’ll be just as delicious!
- Asian-Inspired Breading: Try adding sesame seeds to your breadcrumb mixture for an extra layer of flavor and crunch! They add a beautiful presentation, too!
- Sweet and Savory Glaze: After frying, brush your chicken with a sweet teriyaki glaze or hoisin sauce for an added layer of flavor. It gives a glossy finish that’s simply irresistible!
These variations make it easy to keep your *Crispy Soy Chicken* feeling fresh and new every time you make it. So go ahead, get creative, and find your favorite twist on this classic dish!
Storage & Reheating Instructions
If you find yourself with any leftover *Crispy Soy Chicken*—though I doubt it will happen because it’s that good—you’ll want to store it properly to keep it delicious for the next meal! Here’s how I do it:
First, let the chicken cool completely at room temperature. Once it’s cooled, transfer it to an airtight container. If you have a lot, you can layer the pieces with parchment paper in between to prevent them from sticking together. This way, you’ll have easy access to that crispy goodness later on!
Store the chicken in the fridge for up to 3 days. If you think you won’t eat it within that time, you can freeze it! Just wrap each piece tightly in plastic wrap or foil and place them in a freezer-safe bag or container. It’ll keep well for up to 2 months.
When it comes to reheating, you want to maintain that glorious crunch. The microwave is quick, but it can make your chicken soggy, so avoid it if you can! Instead, pop your leftovers in the oven:
- Preheat your oven to 375°F (190°C).
- Place the chicken pieces on a baking sheet lined with parchment paper.
- Bake for about 10-15 minutes, or until heated through and crispy again. You can even broil it for a minute or two at the end for extra crunchiness—just keep an eye on it so it doesn’t burn!
And there you have it! With these storage and reheating tips, you can enjoy your *Crispy Soy Chicken* even after it’s made. Trust me, it’s worth it!
Nutritional Information
Here’s the scoop on the nutritional values for each serving of *Crispy Soy Chicken*. It’s always good to know what you’re enjoying, right? So, here we go:
- Serving Size: 1 piece
- Calories: 350
- Fat: 20g
- Saturated Fat: 5g
- Unsaturated Fat: 15g
- Trans Fat: 0g
- Carbohydrates: 30g
- Fiber: 2g
- Sugar: 5g
- Protein: 20g
- Cholesterol: 60mg
- Sodium: 800mg
This delicious dish offers a nice balance of protein and carbs, making it a satisfying option for any meal! Just keep in mind the sodium content, especially if you’re watching your salt intake. Enjoy every flavorful bite without worry!
FAQ Section
Got questions about making *Crispy Soy Chicken*? No worries, I’ve got you covered! Here are some of the most common queries I hear, along with my best answers:
Q1: Can I use chicken breasts instead of thighs?
Absolutely! Chicken breasts will work just fine if that’s what you have on hand. Just keep in mind that they can dry out more quickly than thighs, so be careful not to overcook them. You might want to adjust the cooking time slightly!
Q2: How can I make this recipe gluten-free?
You can easily adapt this recipe for gluten-free eating! Swap out the soy sauce for tamari, which is gluten-free, and use gluten-free breadcrumbs or even ground almonds for the coating. You’ll still get that fantastic crunch and flavor!
Q3: What dipping sauces pair well with *Crispy Soy Chicken*?
Oh, the options are endless! A simple sweet chili sauce is a favorite, but you can’t go wrong with a tangy soy-based dipping sauce or even a honey mustard. If you want a bit of heat, try mixing sriracha with mayo for a creamy kick!
Q4: Can I prepare the marinade ahead of time?
Yes, you can! The marinade can be made a day in advance and stored in the fridge. This way, when you’re ready to cook, all you need to do is add the chicken and let it marinate. It’s a great time-saver for busy nights!
Q5: How do I know when the chicken is fully cooked?
The best way to ensure your chicken is done is to use a meat thermometer. The internal temperature should reach 165°F (75°C). If you don’t have a thermometer, cut into the thickest part of the chicken; it should be opaque and the juices should run clear.
Hopefully, these FAQs help you feel more confident in making your *Crispy Soy Chicken*! If you have more questions, don’t hesitate to ask. Happy cooking!
Print
Crispy Soy Chicken: 4 Steps to Irresistible Flavor
Crispy Soy Chicken is a flavorful dish made with marinated chicken and a crunchy coating.
- Total Time: 45 minutes
- Yield: 4 servings 1x
Ingredients
- 4 chicken thighs
- 1/4 cup soy sauce
- 2 tablespoons honey
- 1 tablespoon garlic, minced
- 1 tablespoon ginger, grated
- 1 cup breadcrumbs
- 1/2 cup flour
- 2 eggs, beaten
- Salt and pepper to taste
- Oil for frying
Instructions
- Marinate chicken in soy sauce, honey, garlic, and ginger for at least 30 minutes.
- Preheat oil in a frying pan over medium heat.
- Coat marinated chicken in flour, dip in eggs, then coat with breadcrumbs.
- Fry chicken in hot oil until golden brown and cooked through.
- Remove from oil and let drain on paper towels.
- Serve hot with your choice of sides.
Notes
- Adjust marinade time for desired flavor intensity.
- Use panko breadcrumbs for extra crunch.
- Pair with a dipping sauce for added taste.
- Prep Time: 30 minutes
- Cook Time: 15 minutes
- Category: Main Course
- Method: Frying
- Cuisine: Asian
- Diet: Gluten Free
Nutrition
- Serving Size: 1 piece
- Calories: 350
- Sugar: 5g
- Sodium: 800mg
- Fat: 20g
- Saturated Fat: 5g
- Unsaturated Fat: 15g
- Trans Fat: 0g
- Carbohydrates: 30g
- Fiber: 2g
- Protein: 20g
- Cholesterol: 60mg
Keywords: Crispy Soy Chicken, Chicken Recipes, Asian Cuisine